Simple Way to Lockdown Your Website with Cloudflare Access
Do you have a web application running on Docker? Maybe you found an open-source app on GitHub but aren’t quite sure how secure the application is or if it’ll even stay that way in the future. Maybe your app doesn't have features like MFA, and you don’t want to make any changes to the code...

INTRODUCTION
Do you have a web application running on Docker? Maybe you found an open-source app on GitHub but aren’t quite sure how secure the application is or if it’ll even stay that way in the future. Maybe your app doesn't have features like MFA, and you don’t want to make any changes to the code. Or maybe you’ve thought about adding more apps, more infrastructure in front of your stack, only to realize it might not scale well and could quickly become a nightmare.
That’s exactly why I highly recommend using Cloudflare Access. It’s a mostly free, Cloudflare-managed authentication service that’s perfect for small homelabbers or small businesses looking for robust, hassle-free security.
You can place Cloudflare Access in front of your web application by proxying your domain’s DNS through Cloudflare. The Cloudflare DNS service itself is free, easy to set up, and includes basic DDoS protection. Authentication done through Access is handled entirely on Cloudflare’s servers, so your app never needs to be exposed directly to the public internet—and you don’t have to worry about the compute overhead. It integrates with well-known identity providers (IdPs), but even without using one, you still get features like email-based one-time passwords out of the box. There’s no need to run your own mail server or configure external providers just to send OTPs.
Tutorial
I won't go into detail how you can make a Cloudflare account, but basic requirements are pretty simple:
- You need a Cloudflare account (https://dash.cloudflare.com/sign-up)
- You must own a domain name and host its DNS records on Cloudflare
- In Cloudflare, you need to enable Proxy DNS on the domain/sub-domain you want to protect.
After that, you'll be good to go and can now start using Access. It'll be under the wider Cloudflare Zero Trust service.
From your main Cloudflare dashboard, select Zero Trust (found on the left) -> Access -> Overview.
When you first use Zero Trust or Access it will ask for payment details. Choose the Free plan which supports up to 50 users.
- Click
Create an Application. - Choose
Self-hosted.
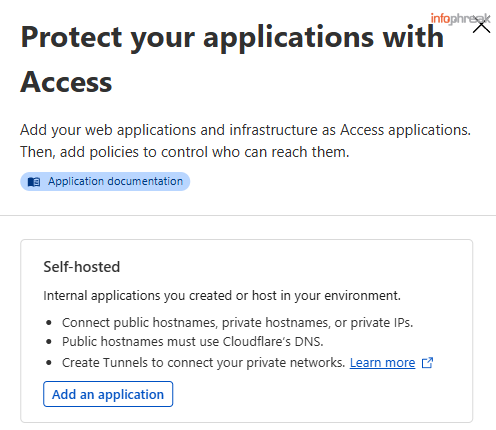
Alternatively under Access on the left side menu → Applications → Add an application
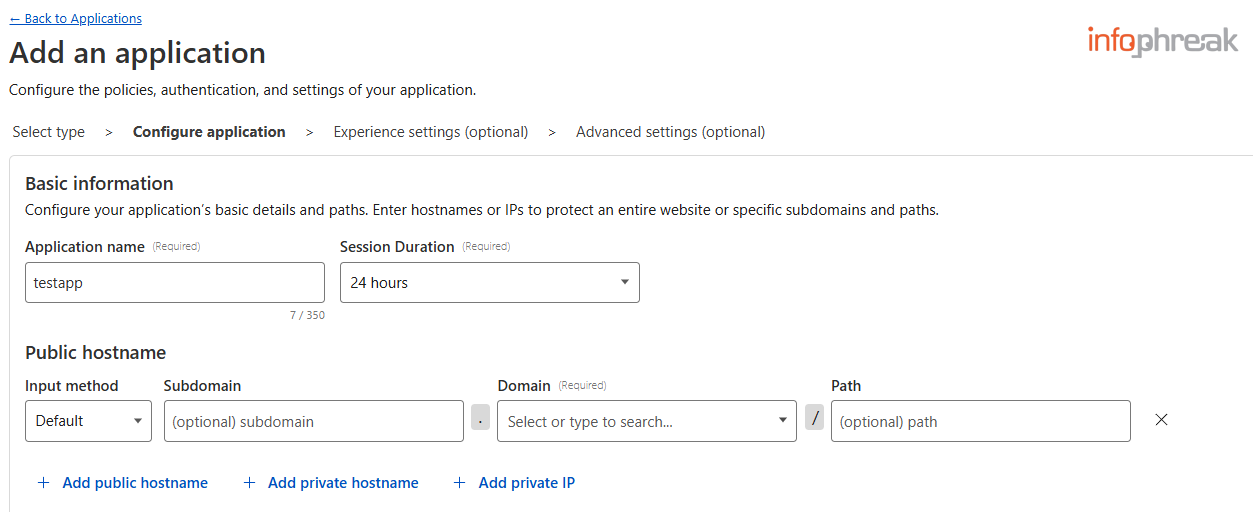
- Under
Basic informationadd the name of your application or project and then add the public hostname, it should populate if you already have this domain name in your Cloudflare DNS records.
- Select
Access Policies→Create new policy(should open a new tab).
These policies include allowed email addresses, IP addresses, and even region-locking.
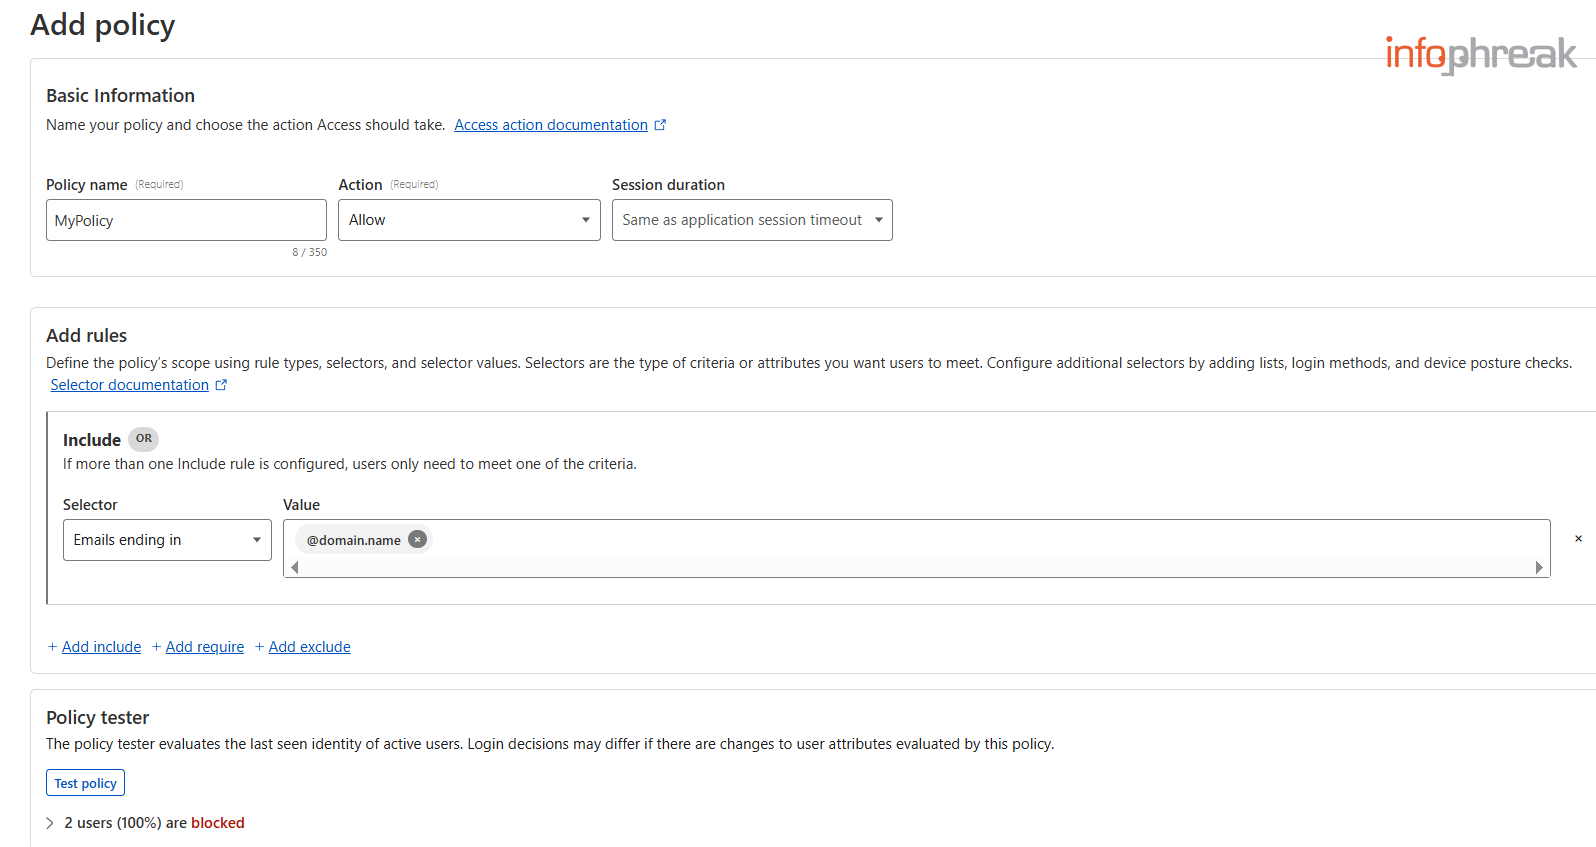
- Fill out a
Policy Name. - For
Actionyou can keep it toAllow(Default). - When configuring Access policies, you'll come across two condition types:
Include– You can define multiple conditions here, but at least one of them must be true for the user to pass authentication.Require– All the conditions here must be true for access to be granted.
To proceed, you need to fill out at least one Include condition.
For the sake of the tutorial let's go with:Emails ending in→@domain.name
Optionally, you can test your policy underPolicy tester. It will test policy conditions against users populated in your account. Users who successfully login will automatically be added to this user list and take up one of the 50 seats. In the event you don't have any users yet, like if you've been following this tutorial from scratch, this is something you can return to later. - Keep the other configuration as is and then hit
Save. - Go back to your application tab.
- Press
Select existing policiesand then pick the policy you just made.

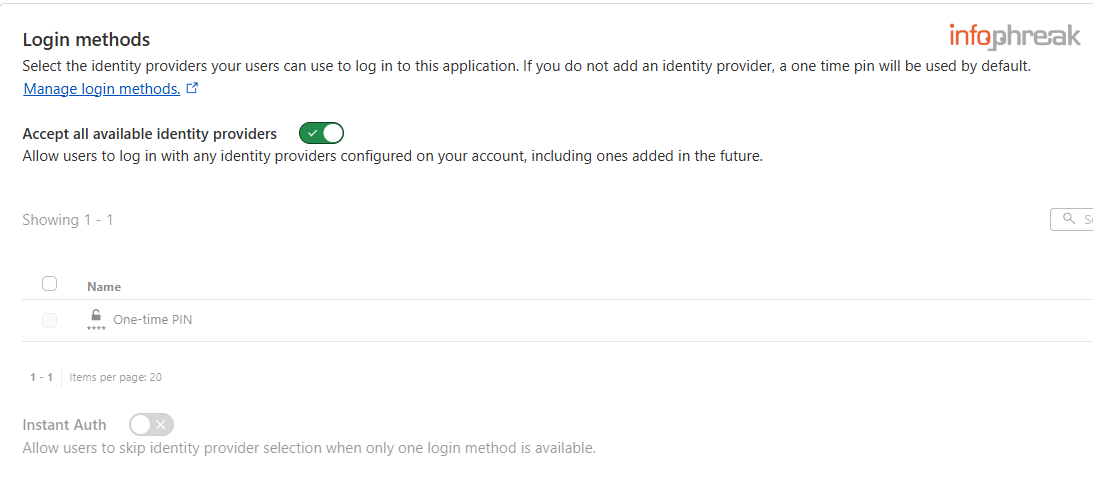
- You can then select
Login methods. By default, you only have One-Time Pin, which is sent via email by Cloudflare. You can click onManage login methodsor go toSettingson the leftmost menu ->Authenticationto see what other login methods or IdPs are available to you (e.g., Okta, SAML).
- Click
Next. - You can leave all the options on this
Experience settingspage using the defaults. However, if you want to, you can also customize the redirect pages for failed logins under theCustom pagessection. - Click
Nextagain forAdvanced settings. - Then press one last
Nextto finalize.
You're now good to test it out.
It might take some time to take effect. Try visiting your website on a different browser or device if it's taking too long to reflect changes. You should first be greeted by the Cloudflare Access login page.
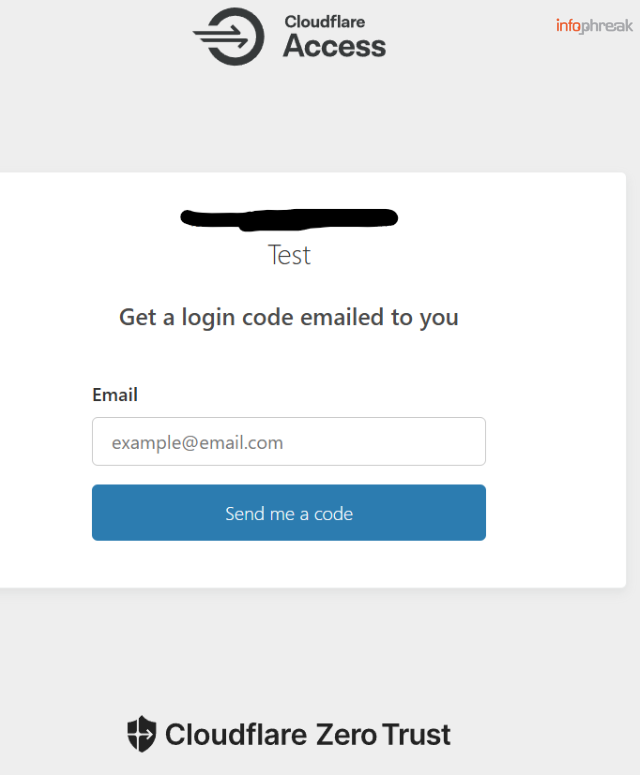
Based on how we configured it, Cloudflare Access will only send login codes or OTPs to email addresses ending in your specified domain (e.g., @domain.name). If the email is invalid, Access won’t reveal that—it simply won't send a code. This silent failure can help protect against brute-forcing and enumeration attacks.
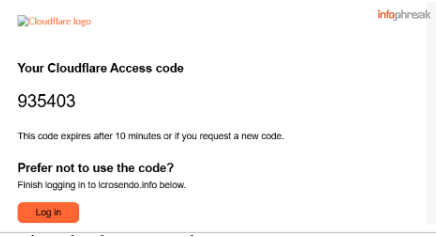
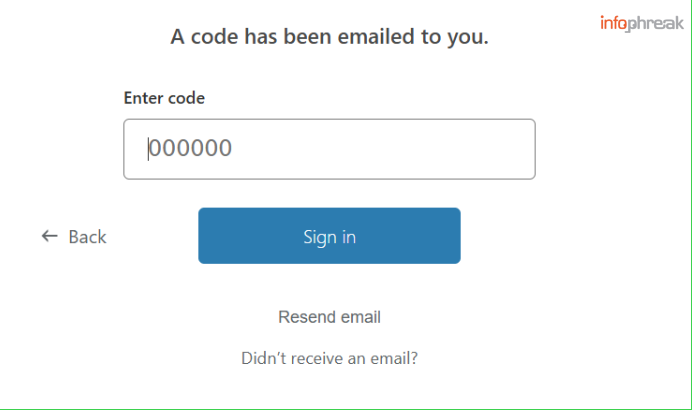
You can then use the code emailed to you to access your website.
If you're still logged into your Cloudflare Zero Trust admin dashboard and then log into your application or website, you might get weird errors. Either log out of your Cloudflare account or just access your website from a different browser.
Additional Notes
- You can use
Rule groups(found on the leftmost menu just under Access) to set up reusable blocks of rules or conditions. You can then set them up in the selectors for rules when you create new policies. - If you need to audit logs, you can check out (from leftmost menu)
Logs→Accessand see log history. - Whoever successfully logs in through Access appears in
UsersunderMy teamon the left menu. Just adding them to your whitelist in your policy won't make them take up a seat (again, you get 50 users or seats under the Free plan). You can press the three dots to the right of a user and then click onView Detailsto get more information. From there, you can also remove them. - If you want to delete or undo the whole setup, you can go back to Applications and on the ellipses to the right of your application just press
Delete.
Summary
Congrats—you’ve successfully added a powerful layer of security to your web application with minimal effort. Cloudflare Access is highly scalable, allowing you to repeat these steps to secure additional sites across different subdomains or domains you control. Best of all, you didn’t have to modify any application code or wrestle with how to position and proxy different components within something like Docker Compose. Everything is done via DNS and doesn't add any additional compute overhead to your server.
And it doesn’t stop at HTTP apps—Cloudflare Access can also protect services like SSH, but that’s a deep dive for another day.