Your next cloud with Nextcloud + Backblaze
In this tutorial, I will be going over how to set up your very own Nextcloud server using Docker Compose on a public cloud provider like DigitalOcean.

INTRODUCTION
Nextcloud is a self-hosted multi-purpose cloud solution you can use like your own personal M365 or Google Workspace. It is free and open source. One of its most drawing features is its ability to incorporate different data sources and support robust file collaboration.
In this tutorial, I will be going over how to set up your very own Nextcloud server using Docker Compose on a public cloud provider like DigitalOcean. Each component essentially will run in its own Docker container. Alternatively, you can use Nextcloud All-in-One, which bundles all those components together into a single image. While more complex, I prefer doing the Compose method because it adheres better to modern microservice practices and offers greater flexibility. As a bonus, I will be going over how to set up Backblaze as additional backend storage for your server.
Pre-requisites
You can host this wherever you want (e.g, Linode, AWS, Azure), but I will use DigitalOcean for this example. Before we start, you will also need your own domain name, which you can get from a domain provider like Namecheap or GoDaddy. I personally use Namecheap, but host the DNS records on Cloudflare to use their free but solid DNS Proxy service.
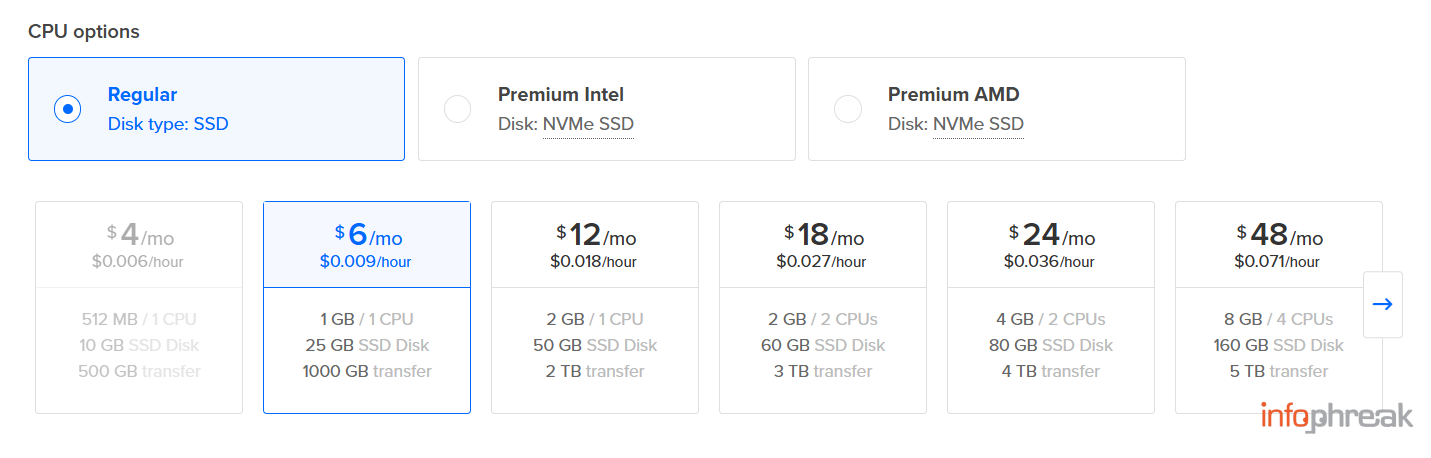
Create a droplet or equivalent virtual machine with at least 1 GB RAM / 1 CPU. This is close to the bare minimum required for a single user interacting with the website. Feel free to provision more resources if you like.
Point the DNS A record of your domain name to the IP address of your Nextcloud host.
I recommend running Ubuntu on your Droplet and following this guide to harden it.

Once you harden it, it is time to install Docker.
Follow the official documentation to install Docker and Docker Compose on your Droplet.
https://docs.docker.com/engine/install/ubuntu/
To add a layer of security, create a separate 'dockeruser' to perform all Docker related tasks.
sudo adduser dockeruser
sudo usermod -aG docker dockeruser

sudo mkdir -p /opt/docker/nextcloud
sudo chown -R dockeruser:dockeruser /opt/docker/
sudo chmod 770 -R /opt/docker/
sudo su dockeruser

cd /opt/docker/nextcloud
So we finally finished setting up our Droplet and Docker. NOW, we can actually start installing Nextcloud!
Nextcloud
The official Nextcloud GitHub suggests several ways to install the application. In this tutorial, we will be building from Docker Compose using MariaDB, Nginx-FPM, and a Nginx-based reverse proxy together with acme-companion to automate handling certificates. There are example files and documentation in the repository we can use that make this process very easy and straightforward.
git clone https://github.com/nextcloud/docker

cd docker/.examples/docker-compose/with-nginx-proxy/mariadb/fpm

nano compose.yaml

# enter a root password for the database after MYSQL_ROOT_PASSWORD=
# insert your nextcloud domain after VIRTUAL_HOST= and LETSENCRYPT_HOST=
# enter a valid email after LETSENCRYPT_EMAIL= and DEFAULT_EMAIL=

nano db.env

# enter a password for the "nextcloud" db user after MYSQL_PASSWORD=

docker compose build --pull
docker compose up -d
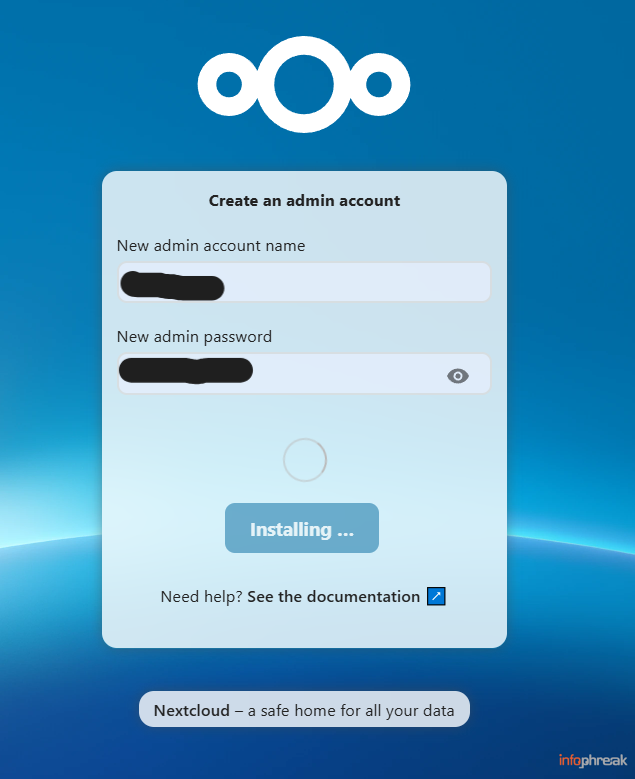
You can now visit your domain through your web browser.
Create your initial admin user and then let Nextcloud set up and install.
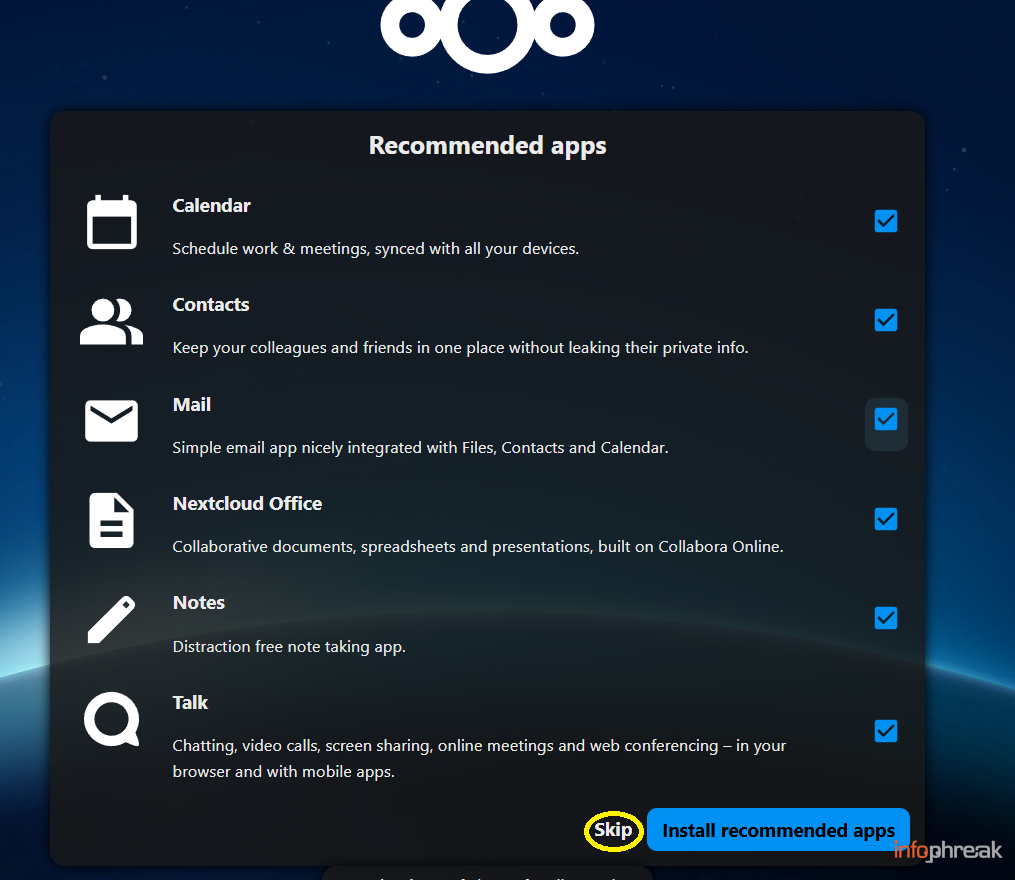
Skip installing recommended applications.
I highly recommend at this early stage you add password lockouts because right now your web app is exposed to the public internet.
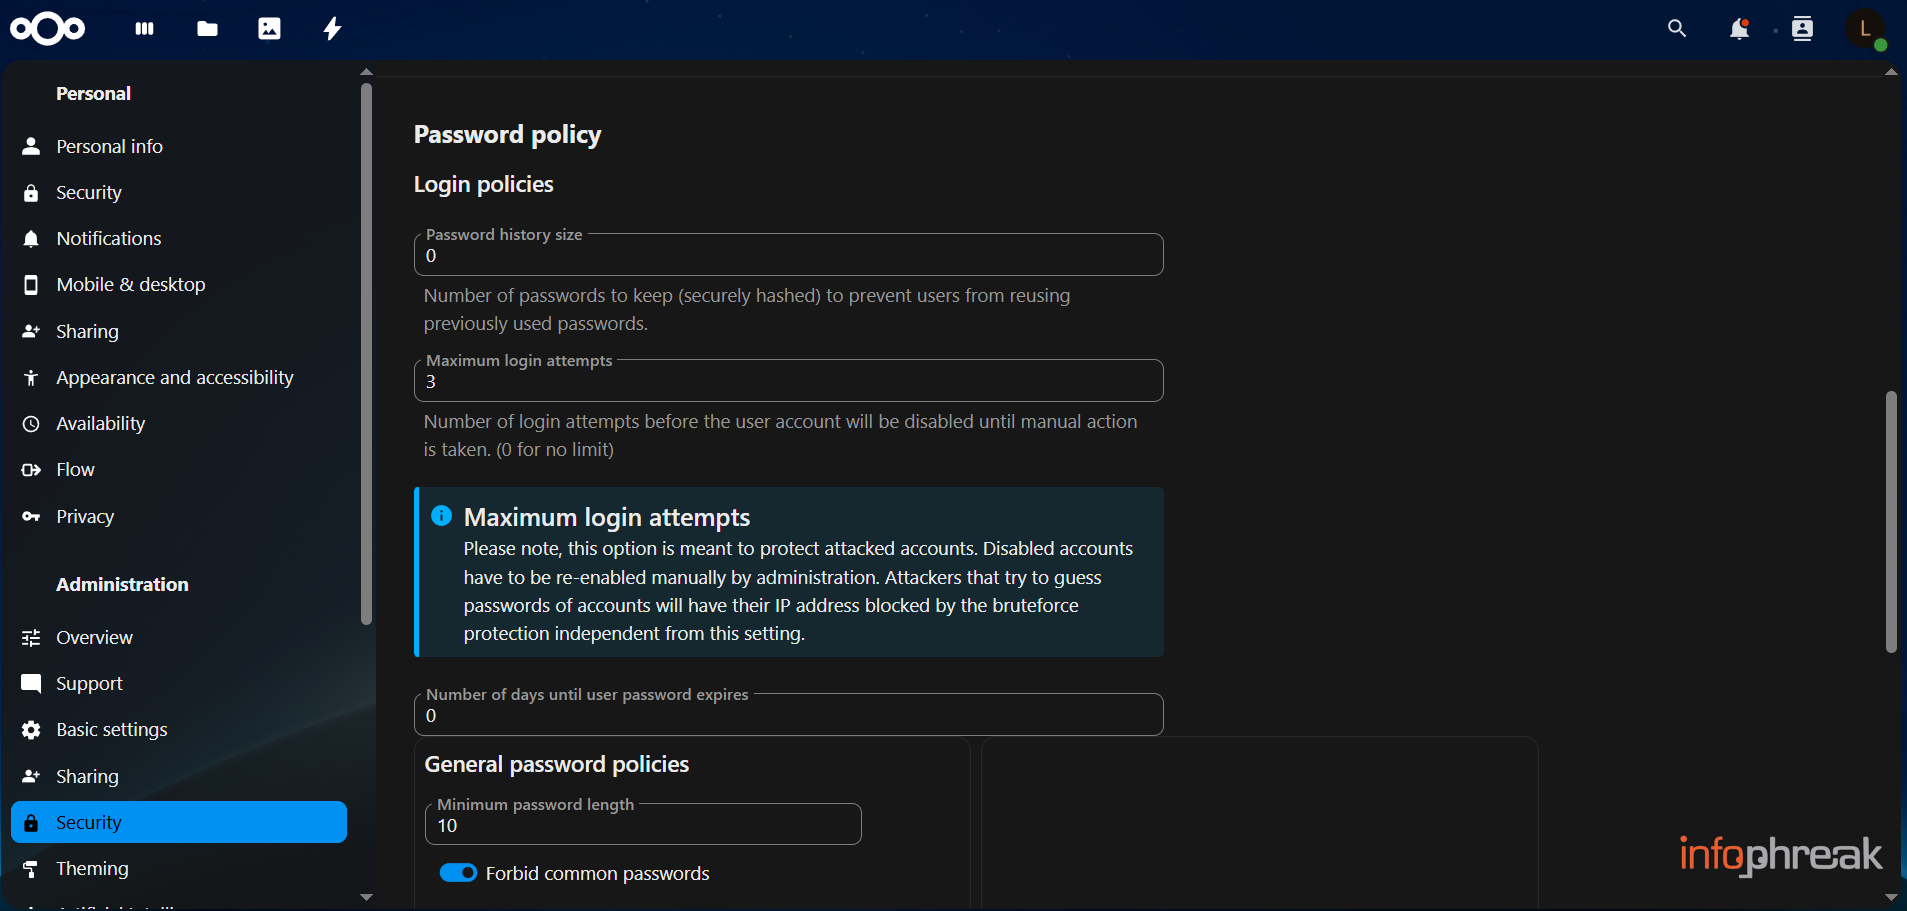
Go to Administration settings. Click on your profile icon on the top right to access the main navigational menu then go to Security > Password policy and configure maximum login attempts. You can also configure two-factor authentication on the same page, but that is out of scope of this guide.
You can also press on Accounts in the main menu to create users.
You can access your website through the Nextcloud mobile app (available both on the Play Store and App Store) by entering your server URL and logging in. If you plan to reinstall Nextcloud using the same server URL, make sure to remove the existing accounts from your phone first, as the app may repeatedly try to log in with old credentials and trigger IP lockouts. Additionally, if you use the Nextcloud Notes app, you may need to reinstall it to prevent synchronization issues.
Feel free to explore the Nextcloud UI.
Bonus: Backblaze B2
For additional storage, you can add a Backblaze bucket to your deployment. Backblaze B2 provides 10GB of free cloud storage.
First, from the main menu, go to Apps > Disabled Apps > then enable External Storage Support.
External storage should now appear as an option under your Administration settings.
You can then follow this guide from Backblaze themselves going over how to create and connect a bucket to your Nextcloud app. As of writing, however, some parts of their guide are a bit outdated and look different from the current version of Nextcloud. Refer to the image below the link to have a look at what the desired configuration looks like within Nextcloud.
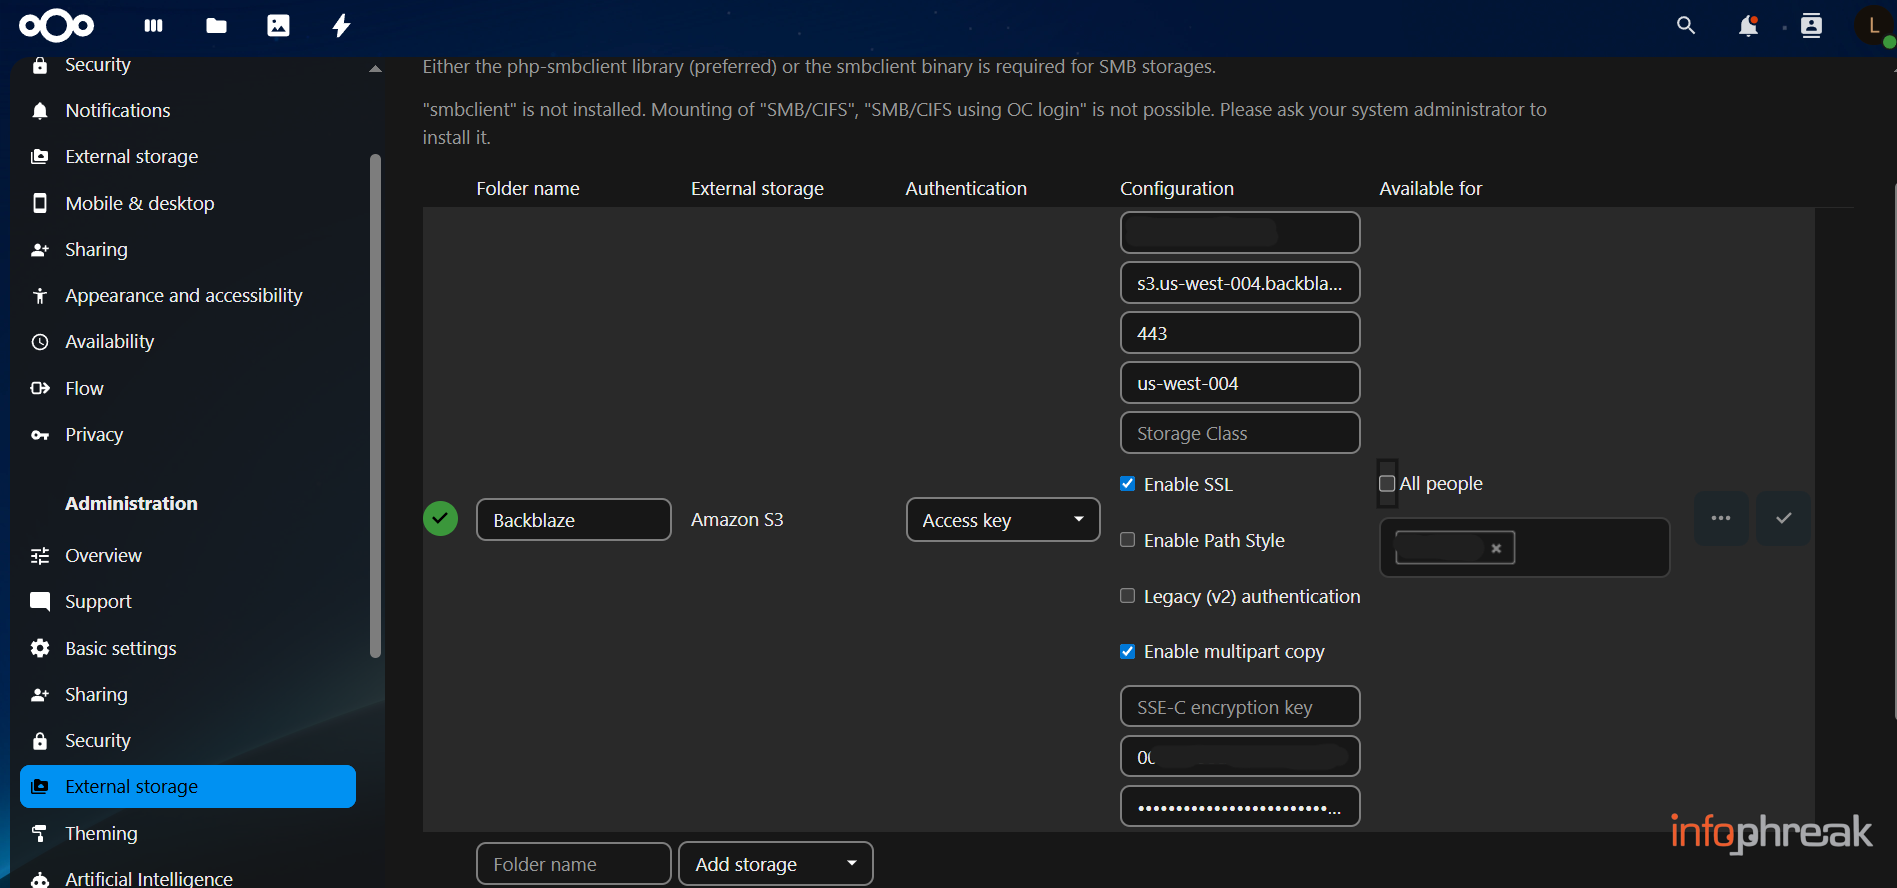
Select Amazon S3for the storage type. Backblaze B2 has an S3-compatible API, so you can integrate it with applications like Nextcloud as you would with a normal Amazon S3 bucket.
On the left, you can set the name of the storage folder. You can select who this storage is available to on the right. You can leave multi-part copy selected and the storage class and encryption key fields empty. The region name, you can extract from the endpoint URL. The access key at the bottom is asking for your application key ID, not the name. You can save by pressing the checkmark on the right.
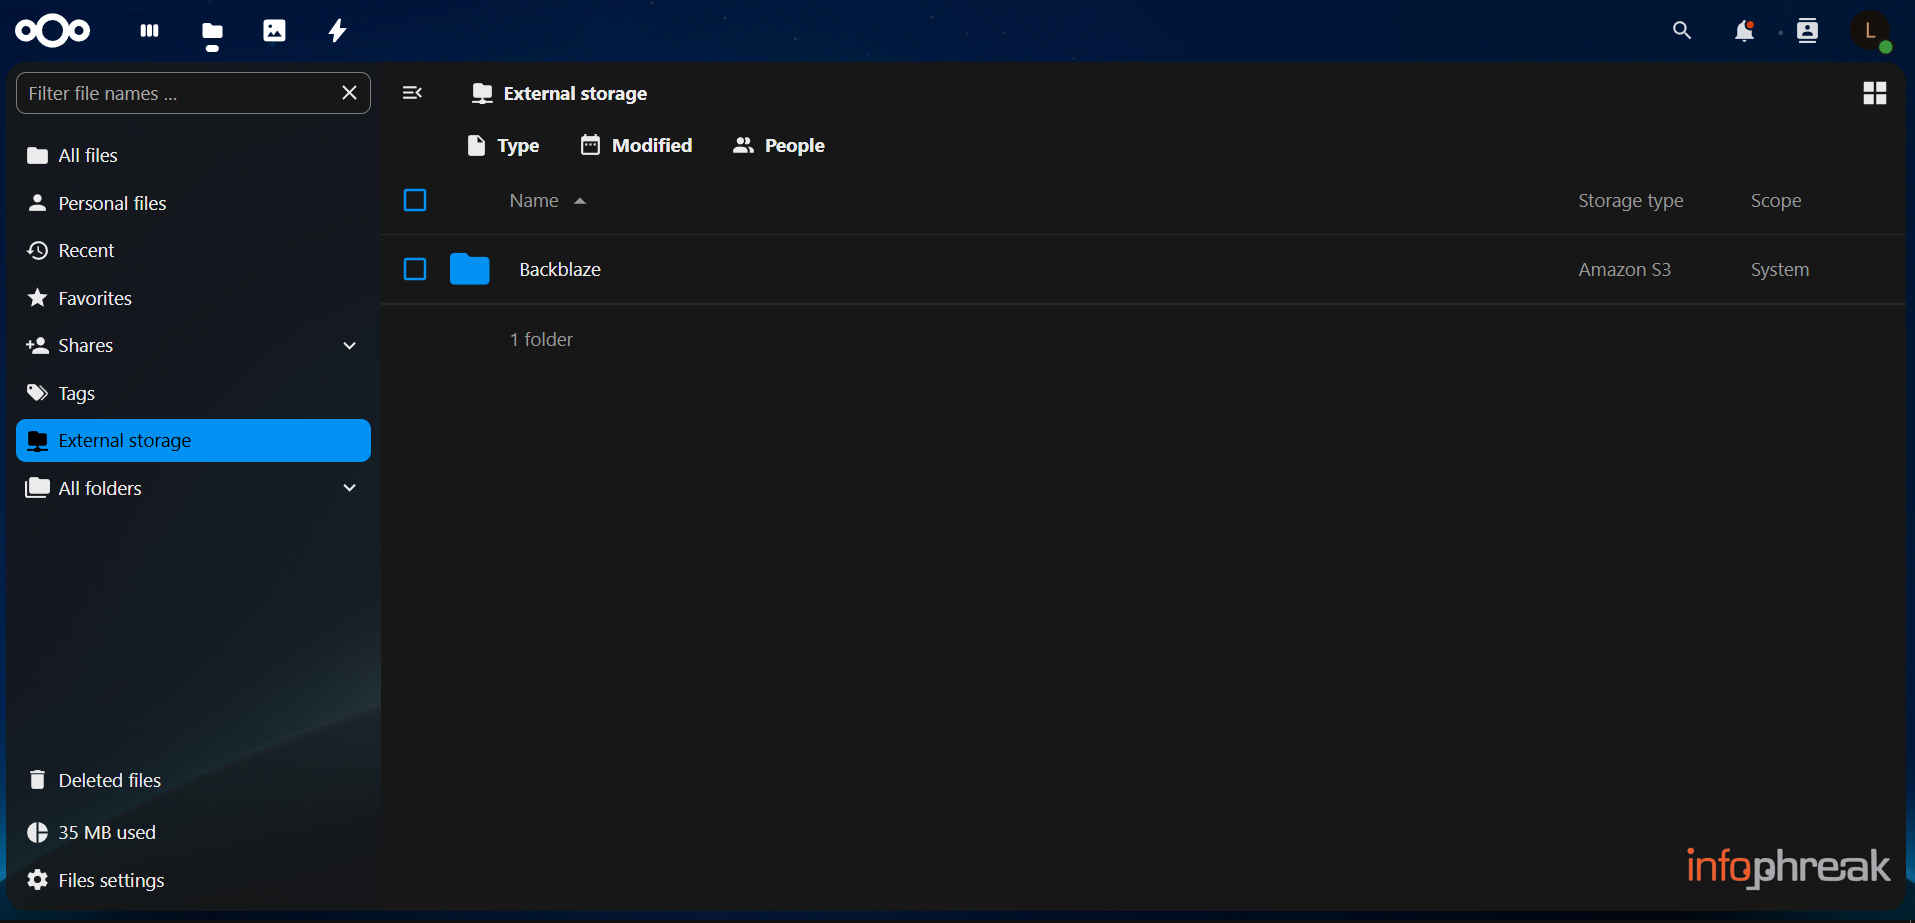
You can then go to Files > External Storage and see your B2 bucket folder, which you can now upload to.
Final Thoughts
Cloud storage is just a slice of what Nextcloud offers. You can do something like adding the Notes app and having a notetaking application you can sync between your different devices, with a single source of truth you control in the cloud. I highly recommend you keep exploring Nextcloud and its features, as well as fine tuning its security.
As for Nextcloud All-in-One and other Nextcloud-related topics, I will probably be writing more articles about them in the future, so stay tuned.