Setting up Outline with Docker, Digital Ocean, and Cloudflare
A full guide on selfhosting Outline with Docker, Digital Ocean, Cloudflare, and Discord OAuth - Blog by SH3LL


Setting up Outline with Docker, Digital Ocean, and Cloudflare
A full guide on selfhosting Outline with Docker, Digital Ocean, Cloudflare, and Discord OAuth - Blog by SH3LL
Connect with me!INTRODUCTION
Thanks for tuning in to my blog! We are going to be setting up a self-hosted Outline platform using Docker. This guide will walk you through from start to finish, including an example OAuth2 setup with Discord.
We are going to use the following:
- Digital Ocean Ubuntu Droplet
- Cloudflare Reverse Proxy/Origin Certificates
- NGINX Docker Container
- Outline Docker Container
- PostgreSQL Docker Container
- Redis Docker Container
- Discord OAuth2 Authentication
This guide assumes you have a decent understanding of Linux, a good amount of patience, and some basic troubleshooting skills. I will try to lay everything out for you the best I can.
Additionally, I will provide some basic steps to harden your droplet and docker setup. This is by no means the most secure build, but a decent baseline based on what I've learned. I highly recommend you do additional research to further secure your setup as needed such as SSH MFA, IPS/IDS, etc...
DEPLOY DROPLET
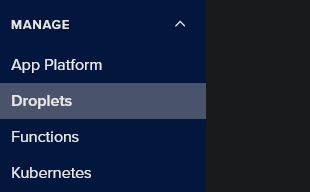
- If you haven't already, create a Digital Ocean account. Once logged in, on your dashboard find the "Droplets" tab, under the "Manage" category, on the left hand navigation pane.
Creation
- Next, let's click "Create Droplet."
- Choose the closest region to you, or the region where a majority of your users are located.
- Under "Choose an image" we are going to use Ubuntu 24.04 (LTS) x64 for this guide.
- Under "Droplet Type" we used "Basic" (optional).
- Under "CPU options" we chose "Premium AMD" (optional) and 2GBmem/1cpu (minimum).
- Under "Choose Authentication Method" select "SSH Key."
Let's create a key
On the device you are going to use to access your droplet, use this guide to create a key pair. This works on both Linux CLI (command-line interface) and Windows Powershell, and is a modern, secure key that works on most systems.
Upload the public key
Now that the keys have been generated and the private key has been added to the authentication agent, we can copy the contents of our public key and add it to the Digital Ocean droplet setup.
- Click on "New SSH Key" in the droplet setup menu.
- Paste the content of your full public key, making sure there is no whitespace or additional formatting.
- Add a friendly name.
- Click "Add SSH Key."
Finalize
Now let's finish up our setup with the last few options.
- Under "We recommend these options" I recommend selecting "Add improved metrics monitoring and alerting (free)."
- Under "Hostname" choose your desired droplet name.
- Click "Create Droplet" at the bottom right.
Access
Now, from your local device, open up a powershell or terminal window as admin and connect to your droplet. In your Digital Ocean panel, you will see an IP for your Droplet. Use the IP in the following command:
ssh root@IP
If you run into issues, try to manually provide your private key (not the one that ends in .pub) with the following command:
Linux
ssh -i "/path/to/private/key" root@IPWindows
ssh -i "\path\to\private\key" root@IP
Now, if you password-protected your private key, supply the password and you should now have a root shell on your droplet.
HARDENING DROPLET
My basic hardening guide can be referenced here.
Follow everything but ignore the "UFW setup" portion of that hardening guide and, instead, use this one:
UFW setup
We are going to be using UFW for this guide, it is easy to use and setup and does its job well.
- Install ufw if not already installed.
sudo apt install ufw
- Install openssl.
sudo apt install openssl
- Allow ssh.
sudo ufw allow ssh
- Allow 80/443 tcp.
sudo ufw allow 80/tcp
sudo ufw allow 443/tcp
- Enable ufw.
sudo ufw enable
- Do not disconnect from your SSH session in case something went wrong. This is a good time to open a new terminal and verify you can still connect via SSH.
CLOUDFLARE
If you haven't already created a cloudflare account, you can create one here.
Once logged in, you will need to add your domain to cloudflare. You can reference their documentation.
Once your site is added, navigate to your website in the cloudflare dashboard.
- Under the DNS tab, create an "A" record pointing to the IP address of your droplet. Under name put your root domain name (ex: "@" or "domain.com") or subdomain (ex: for "sub.domain.com" just put "sub"). Make sure that the proxy is toggled on.
- Under the SSL/TLS main tab, make sure current encryption mode is set to "Full (strict)". Then navigate to the "Edge Certificates" child tab and enable "Always use HTTPS."
- Still under the SSL/TLS section, find the "Origin Server" tab. Create a new origin certificate. You can use a wildcard
*.domain.comto cover all your subdomains. During setup, make sure you download or copy the contents of the certificate and the key and name them accordingly because we will need to be able to distinguish between the key and the origin cert later.
SETTING UP DOCKER APPLICATIONS
Since docker changes quite frequently, I'm going to refer you to the official documentation for installation. You will need to install docker engine and docker compose. Since docker does change, and there are multiple ways to install it, you may have to transpose some of these commands to the correct/modern syntax depending on when you are reading this guide.
Initial Environment
Now that docker engine and docker compose are installed, we can work on getting the docker environment setup.
Create a docker user
Let's first create a docker user so the containers aren’t running under a privileged user.
- Create new dockeruser and add to docker group.
sudo adduser dockeruser

sudo usermod -a -G docker dockeruser
- Create an Outline directory and add correct permissions/ownership for our dockeruser.
sudo mkdir -p /etc/docker/outline

sudo chown -R dockeruser:dockeruser /etc/docker/outline

sudo chmod -R 770 /etc/docker/outline
- Switch to the docker user.
sudo su dockeruser
- Find the PUID of the dockeruser and take note of it. We will need it for the docker.env.
id -u dockeruser
- Find the PGID of the dockeruser and take note of it. We will need it for the docker.env.
id -g dockeruser
Directory & File Setup
- Navigate to the root outline directory.
cd /etc/docker/outline
- Create a docker-compose.yml file.
touch docker-compose.yml
- Create a database directory.
mkdir database-data
- Create an NGINX directory.
mkdir nginx
- Create a storage directory.
mkdir storage-data
- Create a redis directory.
mkdir redis
- Create a docker.env file.
touch docker.env
- Navigate to nginx directory and create conf and key files.
cd /etc/docker/outline/nginx

touch http.conf

touch origin.pem

touch key.pem
Your directory and files should look like this:
.
└── etc/
    └── docker/
        └── outline/
            ├── docker-compose.yml
            ├── docker.env
            ├── database-data/
            │   └── ..
            ├── storage-data/
            │   └── ..
            ├── redis/
            │   └── ..
            └── nginx/
                ├── http.conf
                ├── origin.pem
                └── key.pem
docker-compose.yml Setup
- Navigate to the root Outline directory.
cd /etc/docker/outline
- Edit the
docker-compose.ymlfile.
nano docker-compose.yml
Here is an example of how we have our docker compose yaml configured:
version: "3"
services:
  outline:
    image: docker.getoutline.com/outlinewiki/outline:latest
    restart: always
    env_file: docker.env
    ports:
      - "127.0.0.1:3000:3000"
    volumes:
      - storage-data:/var/lib/outline/data
    depends_on:
      - postgres
      - redis
    networks:
      - default
      - internal

  nginx:
    image: nginx:stable
    restart: always
    env_file: docker.env
    volumes:
      - ./nginx/http.conf:/etc/nginx/nginx.conf
      - ./nginx/origin.pem:/certificates/origin.pem
      - ./nginx/key.pem:/certificates/key.pem
      - ./nginx/dhparam.pem:/certificates/dhparam.pem
    ports:
      - 80:80
      - 443:443
    depends_on:
      - outline
    networks:
      - default

  redis:
    image: redis:latest
    restart: always
    env_file: docker.env
    expose:
      - "6379"
    volumes:
      - ./redis/redis.conf:/redis.conf
    command: ["redis-server", "/redis.conf"]
    networks:
      internal:

  postgres:
    image: postgres:latest
    restart: always
    env_file: docker.env
    expose:
      - "5432"
    volumes:
      - database-data:/var/lib/postgresql/data
    networks:
      internal:

volumes:
  storage-data:
  database-data:

networks:
    default:
    internal:
       internal: true
Here, we specifically declare that all containers except NGINX run on an internal network and are not publicly accessible. Outline is binded to localhost so that nginx can proxy traffic to it, but outline itself is only accessible on the local network.
docker.env Setup
- Navigate to the root Outline directory.
cd /etc/docker/outline
- Edit the
docker.envfile.
nano docker.env
Here is an example of how we have our docker.env configured. If you need more examples, see Outline's official sample here.
Make sure to update the
URLvalue to your actual domain.
## Required Variables
SECRET_KEY= {Random_Key1}
UTILS_SECRET= {Random_Key2}
FORCE_HTTPS=true
ENABLE_UPDATES=true
WEB_CONCURRENCY=2
PUID=1000     # User ID (replace with dockeruser PUID)
PGID=1000     # Group ID (replace with dockeruser PGID)

## Postgres Variables
POSTGRES_USER=outlineusr
POSTGRES_PASSWORD= {Random_Key3}
POSTGRES_DB=outline
DATABASE_URL=postgres://outlineusr:{POSTGRES_PASSWORD}@postgres:5432/outline
PGSSLMODE=disable

## Redis Variables
REDIS_URL=redis://redis:6379

## Domain Variables
URL=https://mydomain.com
PORT=3000

## Rate Limiting Variables
RATE_LIMITER_ENABLED=true
RATE_LIMITER_DURATION_WINDOW=60
RATE_LIMITER_REQUESTS=600

## Local File Storage Variables - ONLY USE IF STORING ASSETS LOCALLY
FILE_STORAGE=local
FILE_STORAGE_LOCAL_ROOT_DIR=/var/lib/outline/data
FILE_STORAGE_UPLOAD_MAX_SIZE=26214400

# Discord Variables
DISCORD_CLIENT_ID=
DISCORD_CLIENT_SECRET=
DISCORD_SERVER_ID=
DISCORD_SERVER_ROLES=
- Generate 3 different random keys with the following command, or use a random key generator, and insert them in the relevant values.
openssl rand -hex 32
- Be sure to replace
{POSTGRES_PASSWORD}on line 12 with its relevant key. - Make sure to configure the discord variables from the next section with their relevant values.
Discord OAuth Setup
For instructions on setting up and obtaining the Discord values for OAuth, use Outline’s official documentation here.
NOTE: you will need to enable developer mode in discord before you can view/copy the server ID. Then, you need to setup an application in the developer portal. You can find developer documentation here.
Configuring NGINX
- Navigate to the nginx directory.
cd /etc/docker/outline/nginx
- Edit the
http.conffile.
nano http.conf
Here is what our nginx config file looks like:
worker_processes auto;
events {
    worker_connections 1024;
}
http {
    upstream outline {
        server outline:3000;
    }
    server {
        listen 80 default_server;
        listen [::]:80 default_server;
        server_name _;
        return 444; # Connection closed without response
    }
    server {
        listen 443 default_server ssl;
        listen [::]:443 default_server ssl;
        server_name _;
        ssl_reject_handshake on; # Reject SSL connection
    }
    server {
        listen 80;
        listen [::]:80;
        server_name mydomain.com;
        return 301 https://$host$request_uri;
    }
    server {
        listen 443 ssl http2;
        listen [::]:443 ssl http2;
        server_name mydomain.com;
        ssl_protocols TLSv1.2 TLSv1.3;
        ssl_ciphers ECDHE-ECDSA-CHACHA20-POLY1305:ECDHE-RSA-CHACHA20-POLY1305:ECDHE-ECDSA-AES128-GCM-SHA256:ECDHE-RSA-AES128-GCM-SHA256:ECDHE-ECDSA-AES256-GCM-SHA384:ECDHE-RSA-AES256-GCM-SHA384:DHE-RSA-AES128-GCM-SHA256:DHE-RSA-AES256-GCM-SHA384:ECDHE-ECDSA-AES128-SHA256:ECDHE-RSA-AES128-SHA256:ECDHE-ECDSA-AES128-SHA:ECDHE-RSA-AES256-SHA384:ECDHE-RSA-AES128-SHA:ECDHE-ECDSA-AES256-SHA384:ECDHE-ECDSA-AES256-SHA:ECDHE-RSA-AES256-SHA:DHE-RSA-AES128-SHA256:DHE-RSA-AES128-SHA:DHE-RSA-AES256-SHA256:DHE-RSA-AES256-SHA:ECDHE-ECDSA-DES-CBC3-SHA:ECDHE-RSA-DES-CBC3-SHA:EDH-RSA-DES-CBC3-SHA:AES128-GCM-SHA256:AES256-GCM-SHA384:AES128-SHA256:AES256-SHA256:AES128-SHA:AES256-SHA:DES-CBC3-SHA:!DSS;
        ssl_prefer_server_ciphers on;
        ssl_session_timeout 24h;
        ssl_stapling on;
        ssl_stapling_verify on;
        ssl_certificate /certificates/origin.pem;
        ssl_certificate_key /certificates/key.pem;
        ssl_dhparam /certificates/dhparam.pem;
        ssl_session_cache shared:OutlineSSL:10m;
        ssl_session_tickets off;
        location / {
            proxy_pass http://outline;
            proxy_set_header Upgrade $http_upgrade;
            proxy_set_header Connection "Upgrade";
            proxy_set_header X-Forwarded-For $proxy_add_x_forwarded_for;
            proxy_set_header Host $host;
            proxy_set_header X-Real-IP $remote_addr;
            proxy_set_header X-Scheme $scheme;
            proxy_set_header X-Forwarded-Proto $scheme;
            proxy_redirect off;
        }
    }
}
This config is set up to deny any incoming requests that are not going to mydomain.com and forwards all http traffic to https and then to the outline docker application on localhost. You will need to replace every occurrence of mydomain.com with your actual domain. This can be easily done by copying the config into a source-code editor like Visual Studio Code and using the find and replace feature.
In the same directory, we are going to insert our cloudflare origin and key files.
- Make sure you are in the correct directory.
cd /etc/docker/outline/nginx
- Copy the contents of your origin cert to the origin.pem.
echo "content of origin cert goes here in quotes" > origin.pem
- Copy the contents of your key to the key.pem file.
echo "content of key goes here in quotes" > key.pem
Now let’s generate our dhparams.
sudo openssl dhparam -out /etc/docker/outline/nginx/dhparam.pem 2048
FINISHING UP
Now that everything is configured, we can compose the docker application.
- Navigate to the root Outline directory.
cd /etc/docker/outline
- Compose the docker application.
docker compose up -d
Once the application is up, you should now be able to access your Outline platform. Please note that DNS records take some time to propagate. If you are unable to access your sites please wait a few hours and try again. If you have any issues, please join our discord, we are happy to assist. If you found any issues with this guide, please let me know in the comments below and I will get it corrected.
If you need to troubleshoot, you can check the docker compose logs or use SSH tunneling to the localhost port for the outline app. Then add a custom hosts file (linux | windows) entry to map the FQDN in order to view the app on your system's browser.
Upgrading Outline
Upgrading is easy! Just use
docker pull docker.getoutline.com/outlinewiki/outline:latest
and then
docker compose down -v
docker compose up -d
Thanks for reading!
- SH3LL
SOURCES
- https://thomasgriffin.com/how-to-install-the-outline-knowledge-base-wiki-on-ubuntu/
- https://docs.getoutline.com/s/hosting/doc/docker-7pfeLP5a8t
- https://github.com/chaifeng/ufw-docker